
Documentation is an necessary element of most projects. Facebook's open source project, Docusaurus, makes creating beautiful and clean documentation easy. We will deploy the Docusaurus app onto Azure Static Web Apps using Azure DevOps and a pipeline written in YAML.
These docs will assume basic knowledge of Git, Node Package Manager (npm), and markdown. Tutorials are readily available for all of these topics across the internet for the unfamiliar.
Install Docusaurus
We will begin by creating a Docusaurus app. Official documentation for this step is available at Docusaurus Docs: Scaffold Project Website.
Navigate to a new empty directory.
Run the
create-docusaurusexecutable via Node Package eXecute(npx) package. I will call the projectdocusaurus-example, but feel free to change the project name.npx create-docusaurus@latest docusaurus-example classicIf all goes well, you should see an output similar to the following:
![Successful run of create-Docusaurus begins with [Success] Created docusaurus-example](/assets/images/create-docusaurus-output-e14135166558a03da5c2dca97660d7a5.png)
Serve the project locally. Run the
startscript to serve the docs to the default url of http://localhost:3000. You will need to navigate to the folder titleddocusaurus-examplebefore running the start script.cd docusaurus-example
npm startWhen you open your browser to http://localhost:3000, you should see a screen like pictured below:
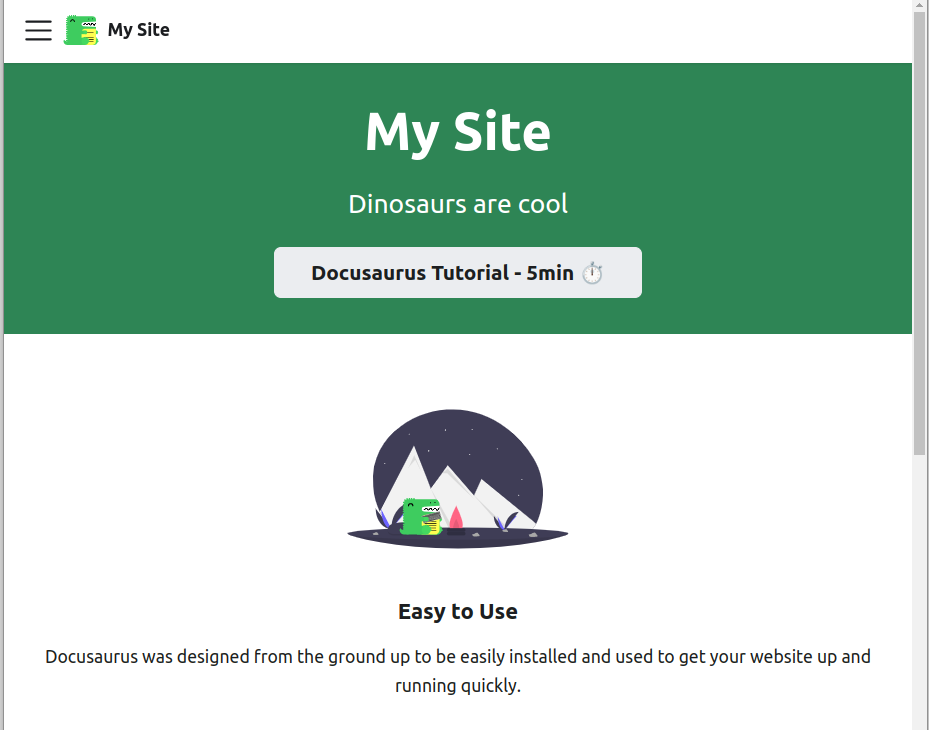
From here, you can customize the docs to fit your needs. We will leave the docs in their default state for the purpose of this tutorial.
Push Project to Azure DevOps
Docusaurus can be deployed from a variety of cloud repos like Github. This tutorial will use Azure DevOps so that we can make use of the Pipelines feature.
First, navigate to Azure DevOps at https://dev.azure.com and create a new project within your organization. If you haven't used Azure DevOps before, you may need to configure it to work with your Microsoft account. I created an organization and a new project called "tutorials".
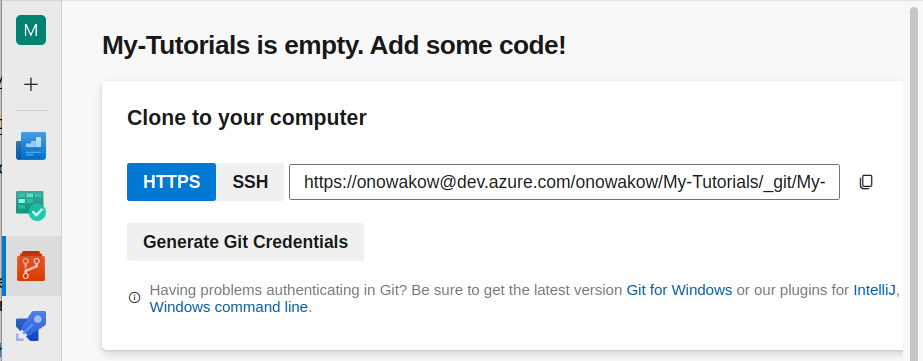
Go to Repos in the sidebar. You should see a message like "Tutorials is empty. Add some code." Copy the HTTPs link and save it for later. We will use the "Generate Git Credentials" button later.
Initialize an new git repo in the parent folder of your Docusaurus project. For example, if your Docusaurus project is at /documents/docs-project/docusaurus-example, initialize the repository in docs-project. This will help us later when we add a builds folder to house the pipeline files.
a. Initialize a repo and add your Docusaurus files:
git init
git add .b. Make your initial commit:
git commit -m "Create new Docusaurus project"c. Rename the default branch from "master" to "main". This step is not necessary, but some developers prefer it
git branch -M maind. Add the Azure DevOps repo as your remote repository. For this step, paste your HTTPS link from the Azure DevOps Repo page as shown in step 2 of this section:
git remote add origin https://onowakow@dev.azure.com/onowakow/My-Tutorials/_git/My-TutorialsYour IDE should prompt you for a password. This password is found by clicking "Generate Git Credentials" in your Azure DevOps Repo.
Note: "origin" is the default name for a remote repo in git. Feel free to name it whatever is appropriate, but know that certain git command shortcuts may not work.
e. Push your changes:
git push origin mainNow that we have a local and remote repo set up, we can create a static web app.
Configure a Static Web App
Navigate to the Azure Portal at https://portal.azure.com/ and create an account if you don't already have one. You can create an account for free and get $200 promotional credit following this Microsoft link https://azure.microsoft.com/en-us/free/. Azure Static Web Apps have a great hobby tier that is always free (as of May 2023).
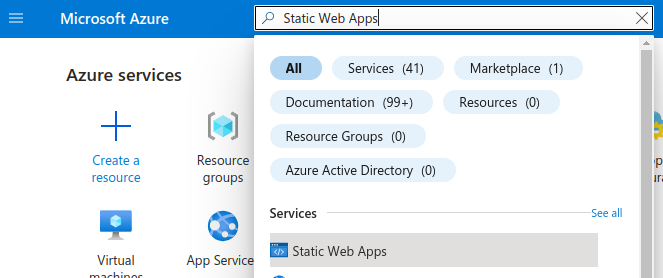
In the top search bar of the Azure Portal, search for and select Static Web Apps. Click the button to "Create Static Web App".
Fill out the form to create a static web app. The JSON and screenshot below show how I populated the form.
Your details may be different to match your subscription, resource group, web app name, etc. If you don't have a resource group, make one.
Note: Resource groups are a way to group resources with shared permissions and policies.
{
  "Subscription": "Azure subscription 1",
  "Resource Group": "tutorials",
  "Name": "docusaurus-example",
  "Hosting plan": "Free",
  "Azure Functions and staging details": "West US 2",
  "Deployment details": "other"
}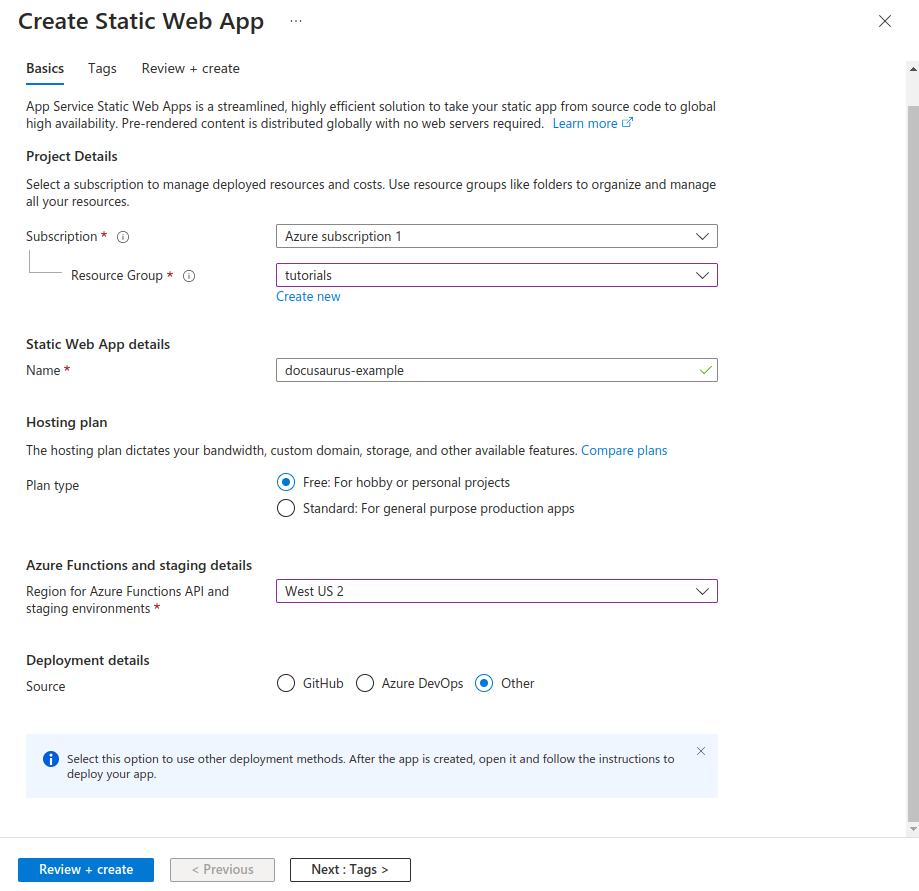
Notice how we set the
Deployment detailstoOther. This section can be configured to deploy your app upon pushing to a remote repository. We want to set up a pipeline to build and configure the app prior to deploying it, so do not selectAzure DevOps.Finally, click
Review and Create, confirm the details, and selectCreate.To confirm that your app is running, go to the resource, and in the Overview tab, go to the static web app URL. The app should show that it is running.

Get deployment details. Navigate to your static web app in the Azure Portal. In the Overview tab, select
Manage Deployment Token.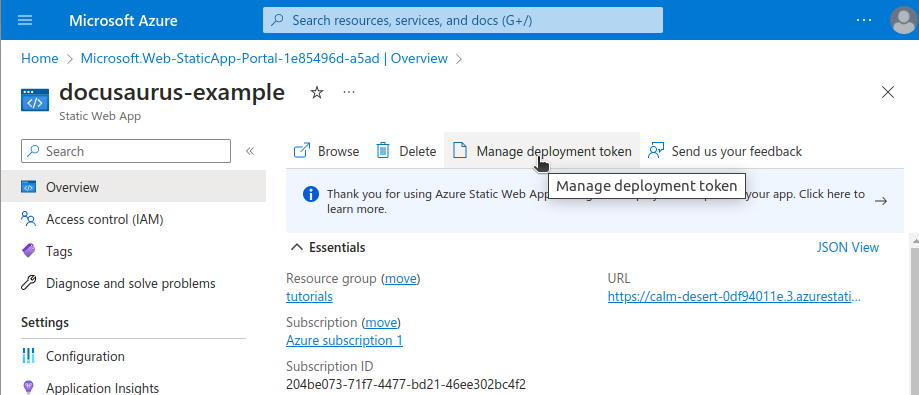
Copy the deployment token value into a safe place for the pipeline step.
Create a Build Pipeline
We will write a simple pipeline using YAML, and import the YAML into Azure DevOps. Do not worry if you are unfamiliar with YAML. You will see that YAML is fairly easy to work with.
In your Docusaurus parent folder, create a folder called
builds. Your repo should now have two folders: one for the Docusaurus project (perhaps called 'docusaurus-example') and one for builds called 'builds'.Create a file called
build-and-deploy.yaml. The name can be whatever suits your project. The code will be followed by an explanation of the fields. Be sure to commit these changes and push them to your Azure DevOps repo.In
build-and-deploy.yaml, add the following code, making changes to suit your project:trigger: none
pool:
vmImage: ubuntu-latest
steps:
- task: AzureStaticWebApp@0
inputs:
app_location: docusaurus-example
app_build_command: npm run build
output_location: build
env:
azure_static_web_apps_api_token: $(swa_deployment_token)trigger: For now, we will manually trigger the pipeline. We could also trigger the pipeline automatically (continuous integration style) like the following code block:
trigger:
  branches:
    include:
      - main
    paths:
      include:
- docusaurus-example/*vmImage: The virtual machine image tells the pipeline which virtual machine to run on. The
AzureStaticWebApp@0task requiresubuntu-latest.app_location: The location of the app's root relative to the repository. If the project was in the app root, the app_location would be ''
app_build_command: The
AzureStaticWebApp@0task is wonderful because it automatically builds the app.app_build_commandallows for a custom build command. We know that Docusaurs are build withnpm run buildbecause the script is specified in thepackage.jsonfile.output_location:
output_locationis relative to theapp_locationand not to the root. By default, Docusaurus will build to thebuildfolder.env: azure_static_web_apps_api_token: This field name must be exactly as shown. This will load an environmental variable into the pipeline to allow the code to be uploaded to the static web app. Do not store the static web app deployment token in the code. We will load it later in the DevOps platform.
Also see: AzureStaticWebApp@0 Task Docs
Set up a Build in DevOps
DevOps allows us to set up a build for a repo. There are a number of ways to create a pipeline, but this method allows us to use our premade YAML.
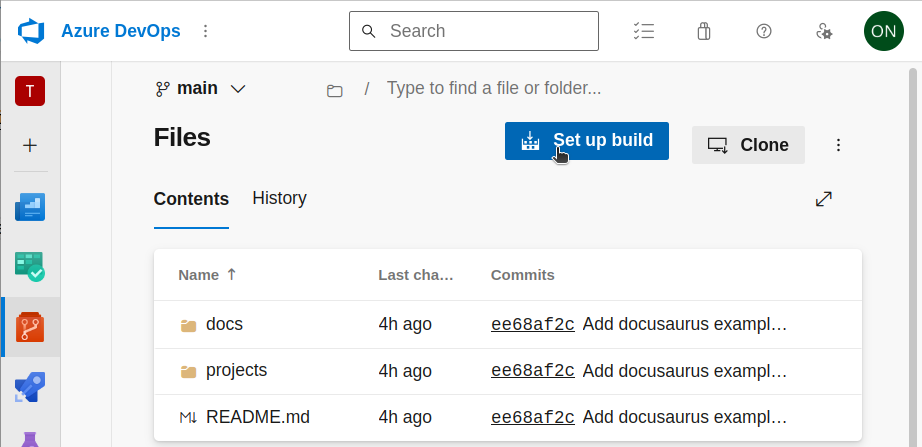
Go to Azure DevOps and click on the Repos icon. At the top of your repo, there should be a "Set up Build" button as shown below. Click the Set up Build button.
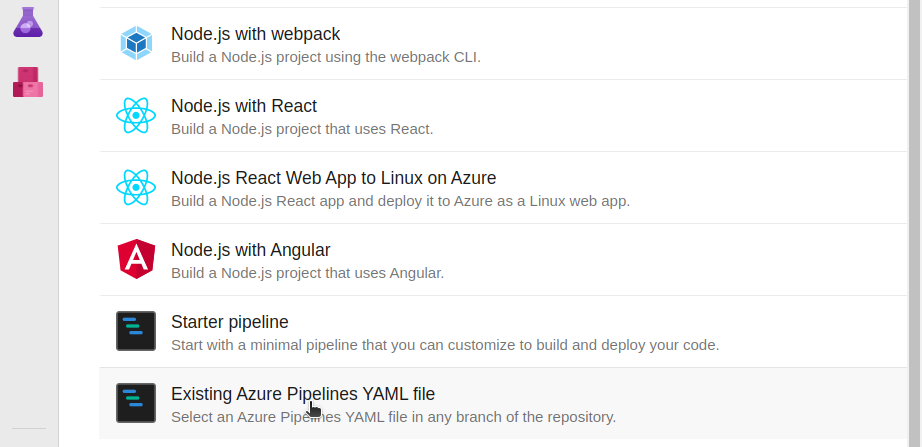
Select the option to use preexisting YAML.
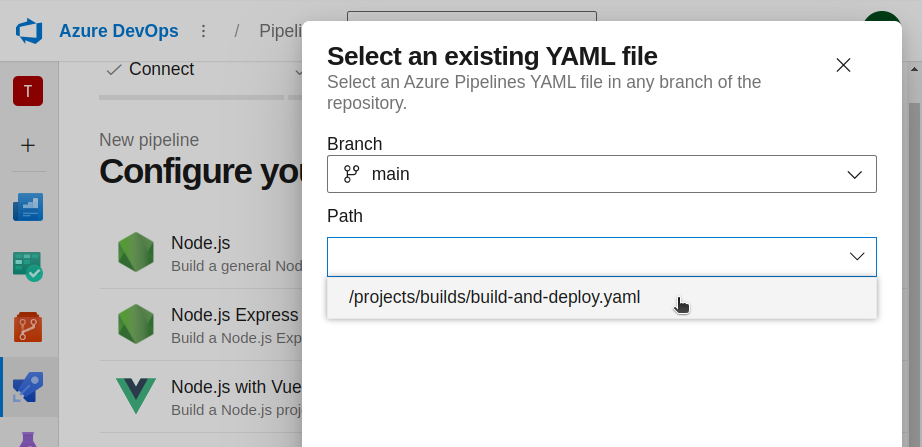
Find the YAML file that we created and select it for the new build.
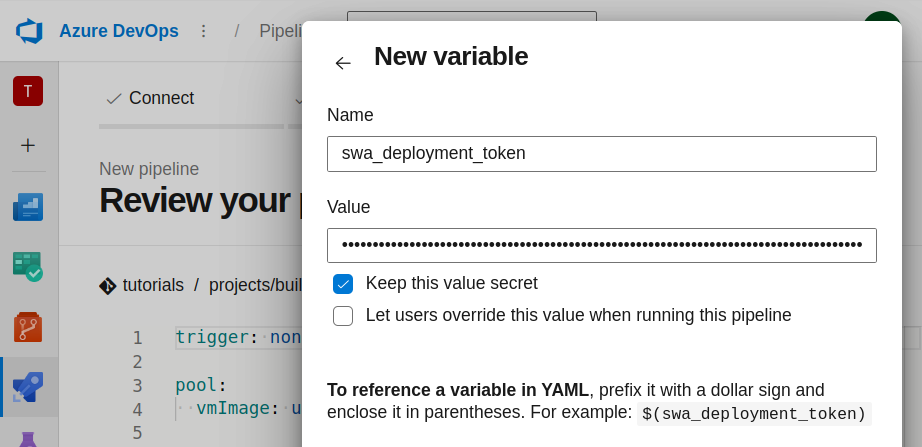
Add the deployment token as an environment variable. This value can be found in the Azure Portal as explained earlier in this tutorial. The variable name
swa_deployment_tokencorresponds to the variable in the YAML. In the New Variable form, add a variable with the nameswa_deployment_tokenwith the value being the deployment token found in your static web app in the Azure Portal. Select Keep this value secret.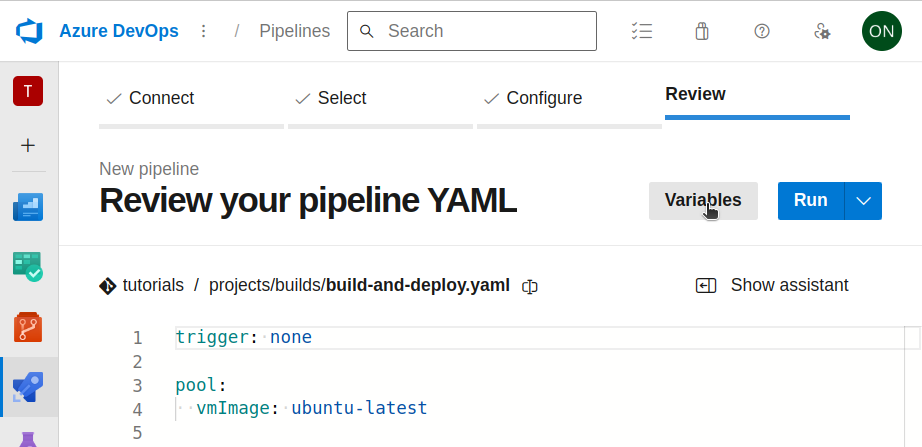
Make sure that your DevOps repo has the most recent Docusaurus changes and run the pipeline. For future runs, you can find your new pipeline in the Pipelines tab. You can manually run the pipeline from here, or set up a trigger in the YAML to run the pipeline when changes are pushed to the repo.
You can also check the status of the pipeline in the Pipelines tab.
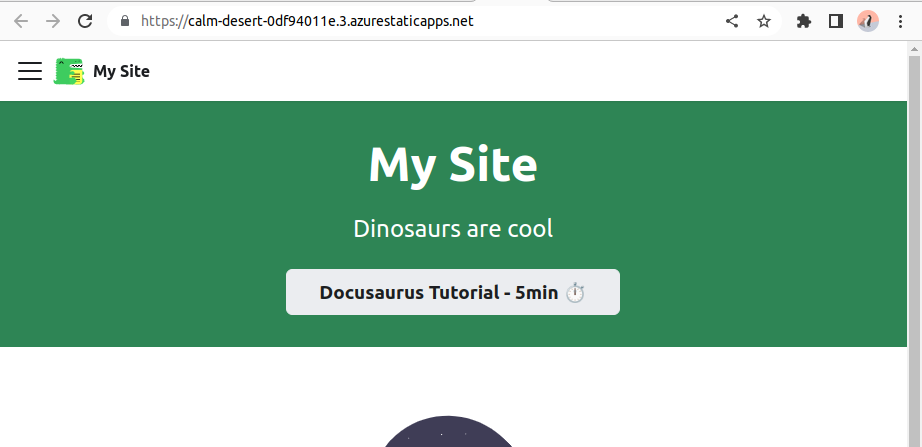
Success!
If all went well, when you visit your static web app, you should see the Docusaurus app.
Adding Custom Domain with NameCheap
Adding a custom domain can be done using a variety of domain providers. This Microsoft video, How to set up a custom domain name in Azure Static Web Apps, provides a thorough tutorial for accomplishing this. They use NameCheap for the tutorial, and I would recommend doing the same. Other providers like Google or GoDaddy may have additional steps.
Discussion
Docusaurus can be customized to be primarily a blog rather than docs
The above process can be applied to most websites including other Single Page Applications (SPAs) like React or Angular.