Growing Mushrooms
I started growing gourmet mushrooms in August of 2023 out of curiosity about the process. I have successfully grown blue oyster mushrooms on straw, and I'm working on growing lions mane on sawdust.
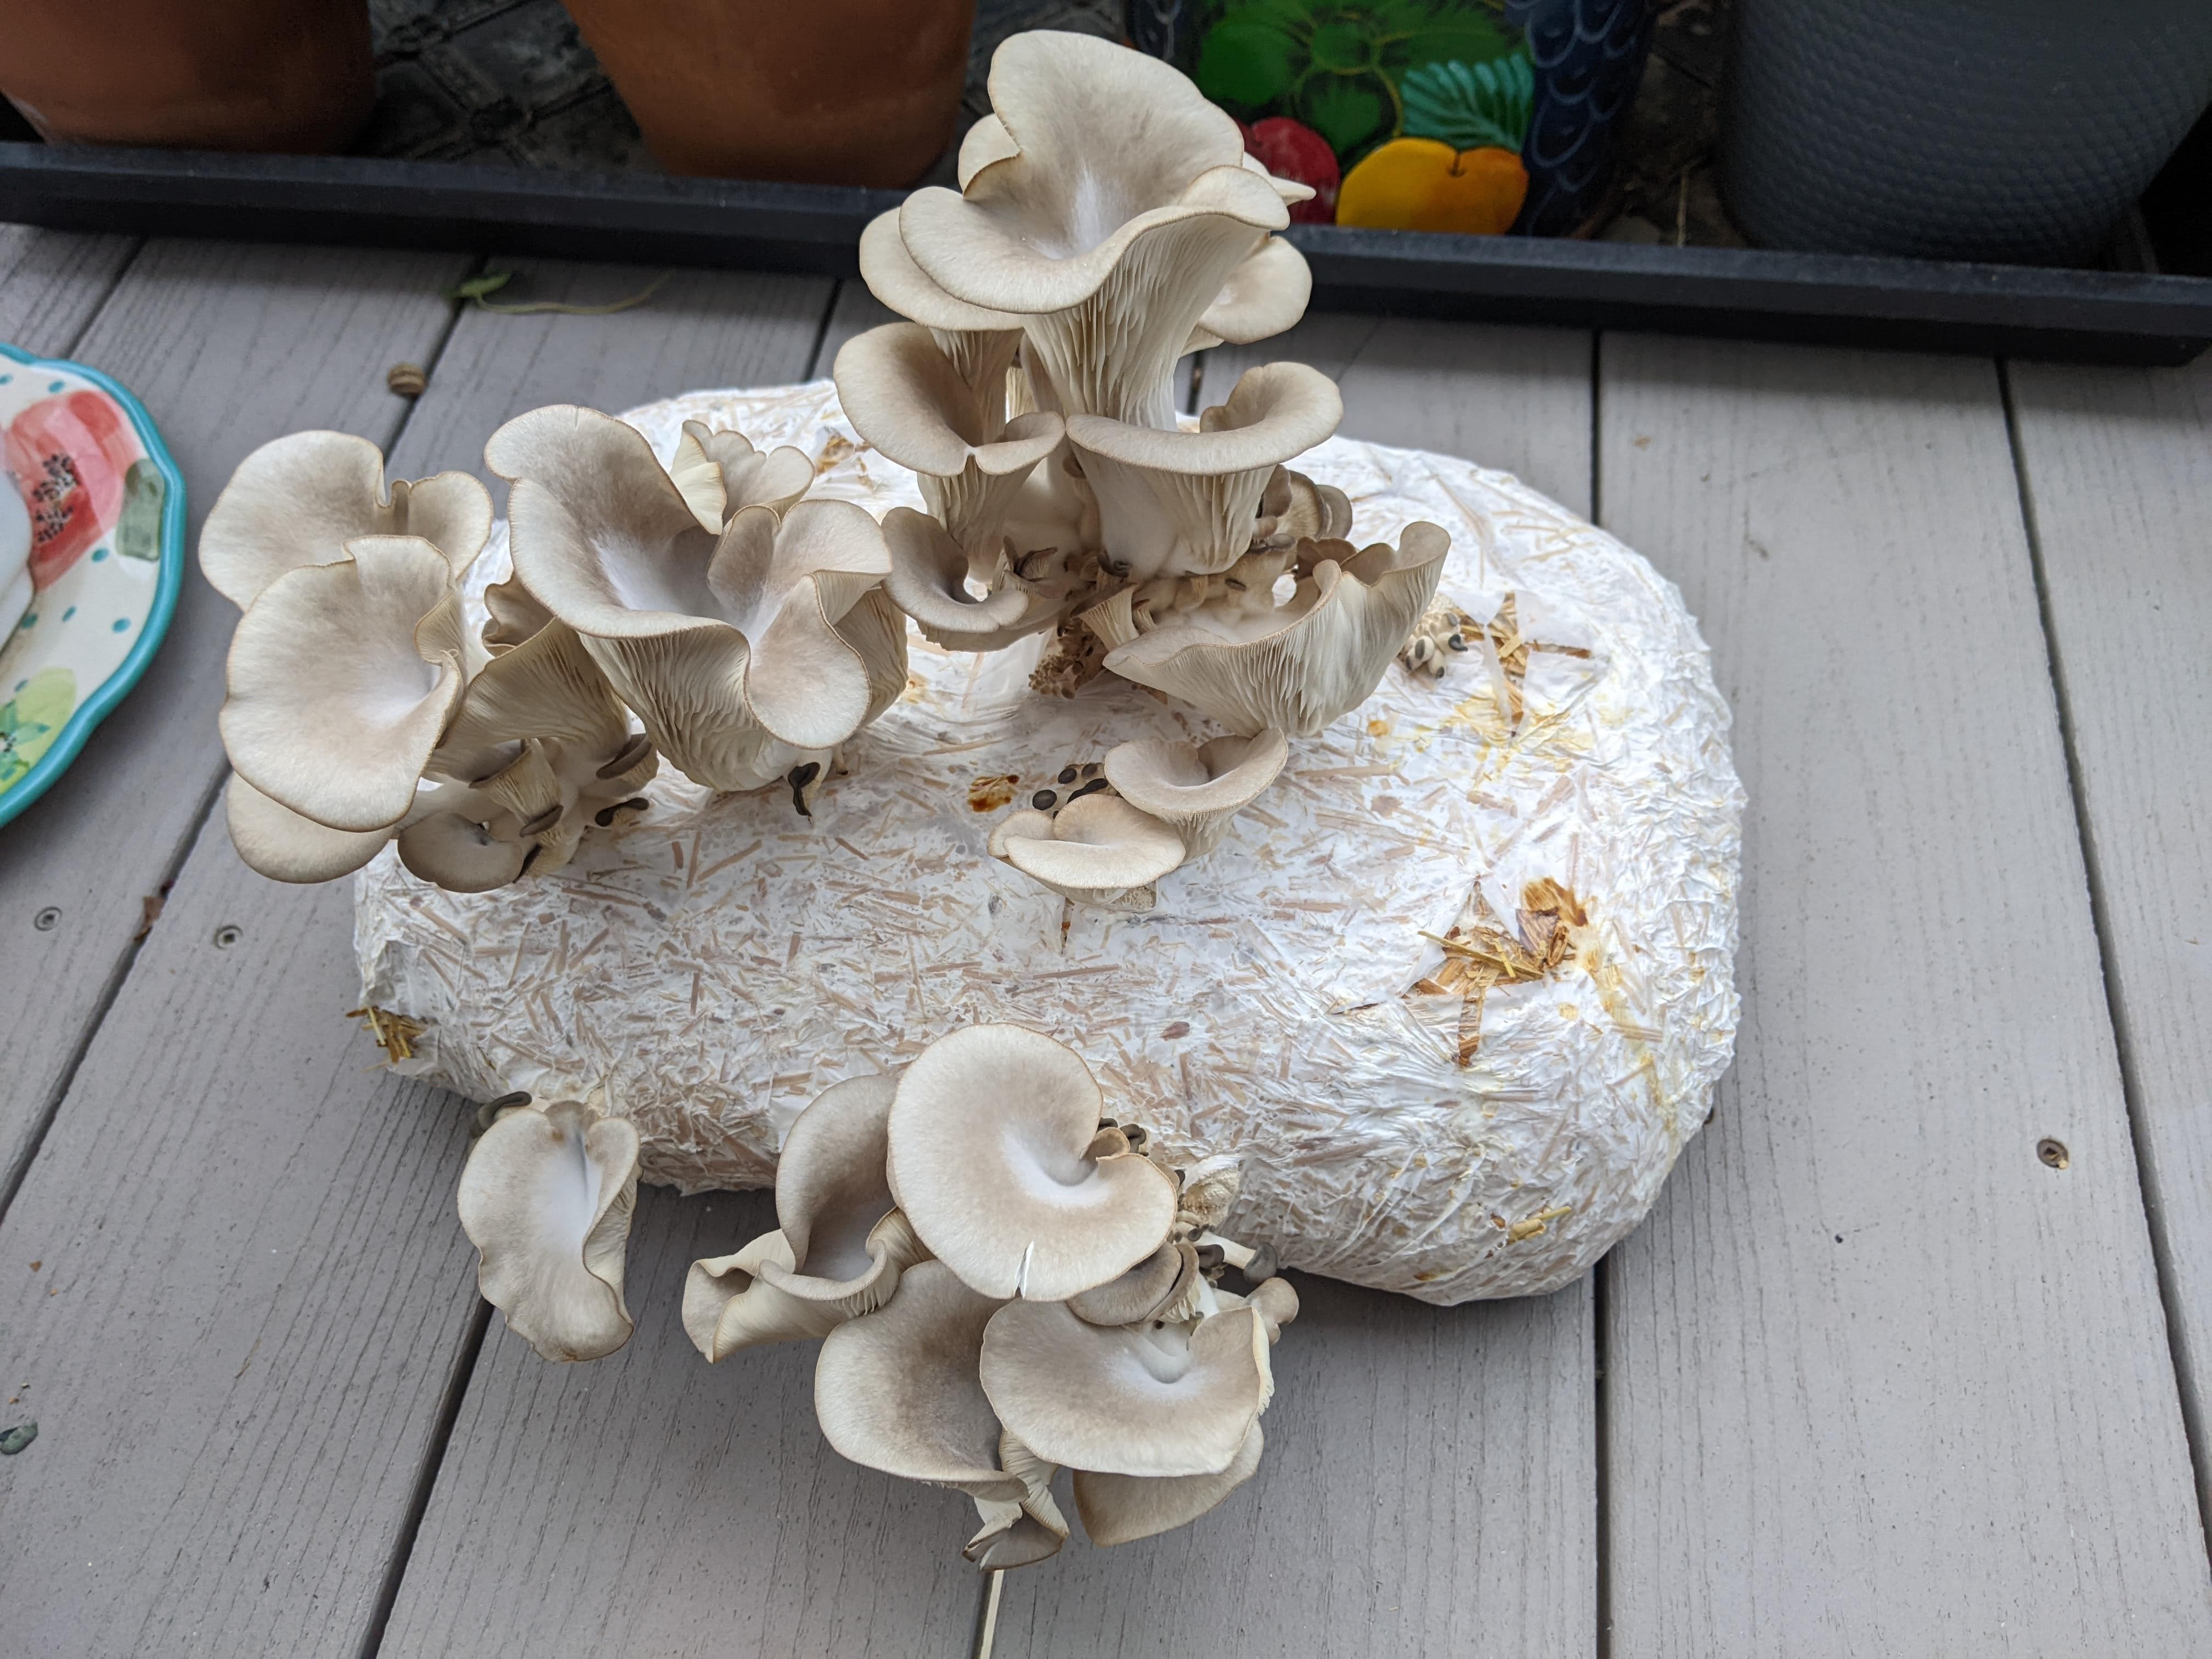
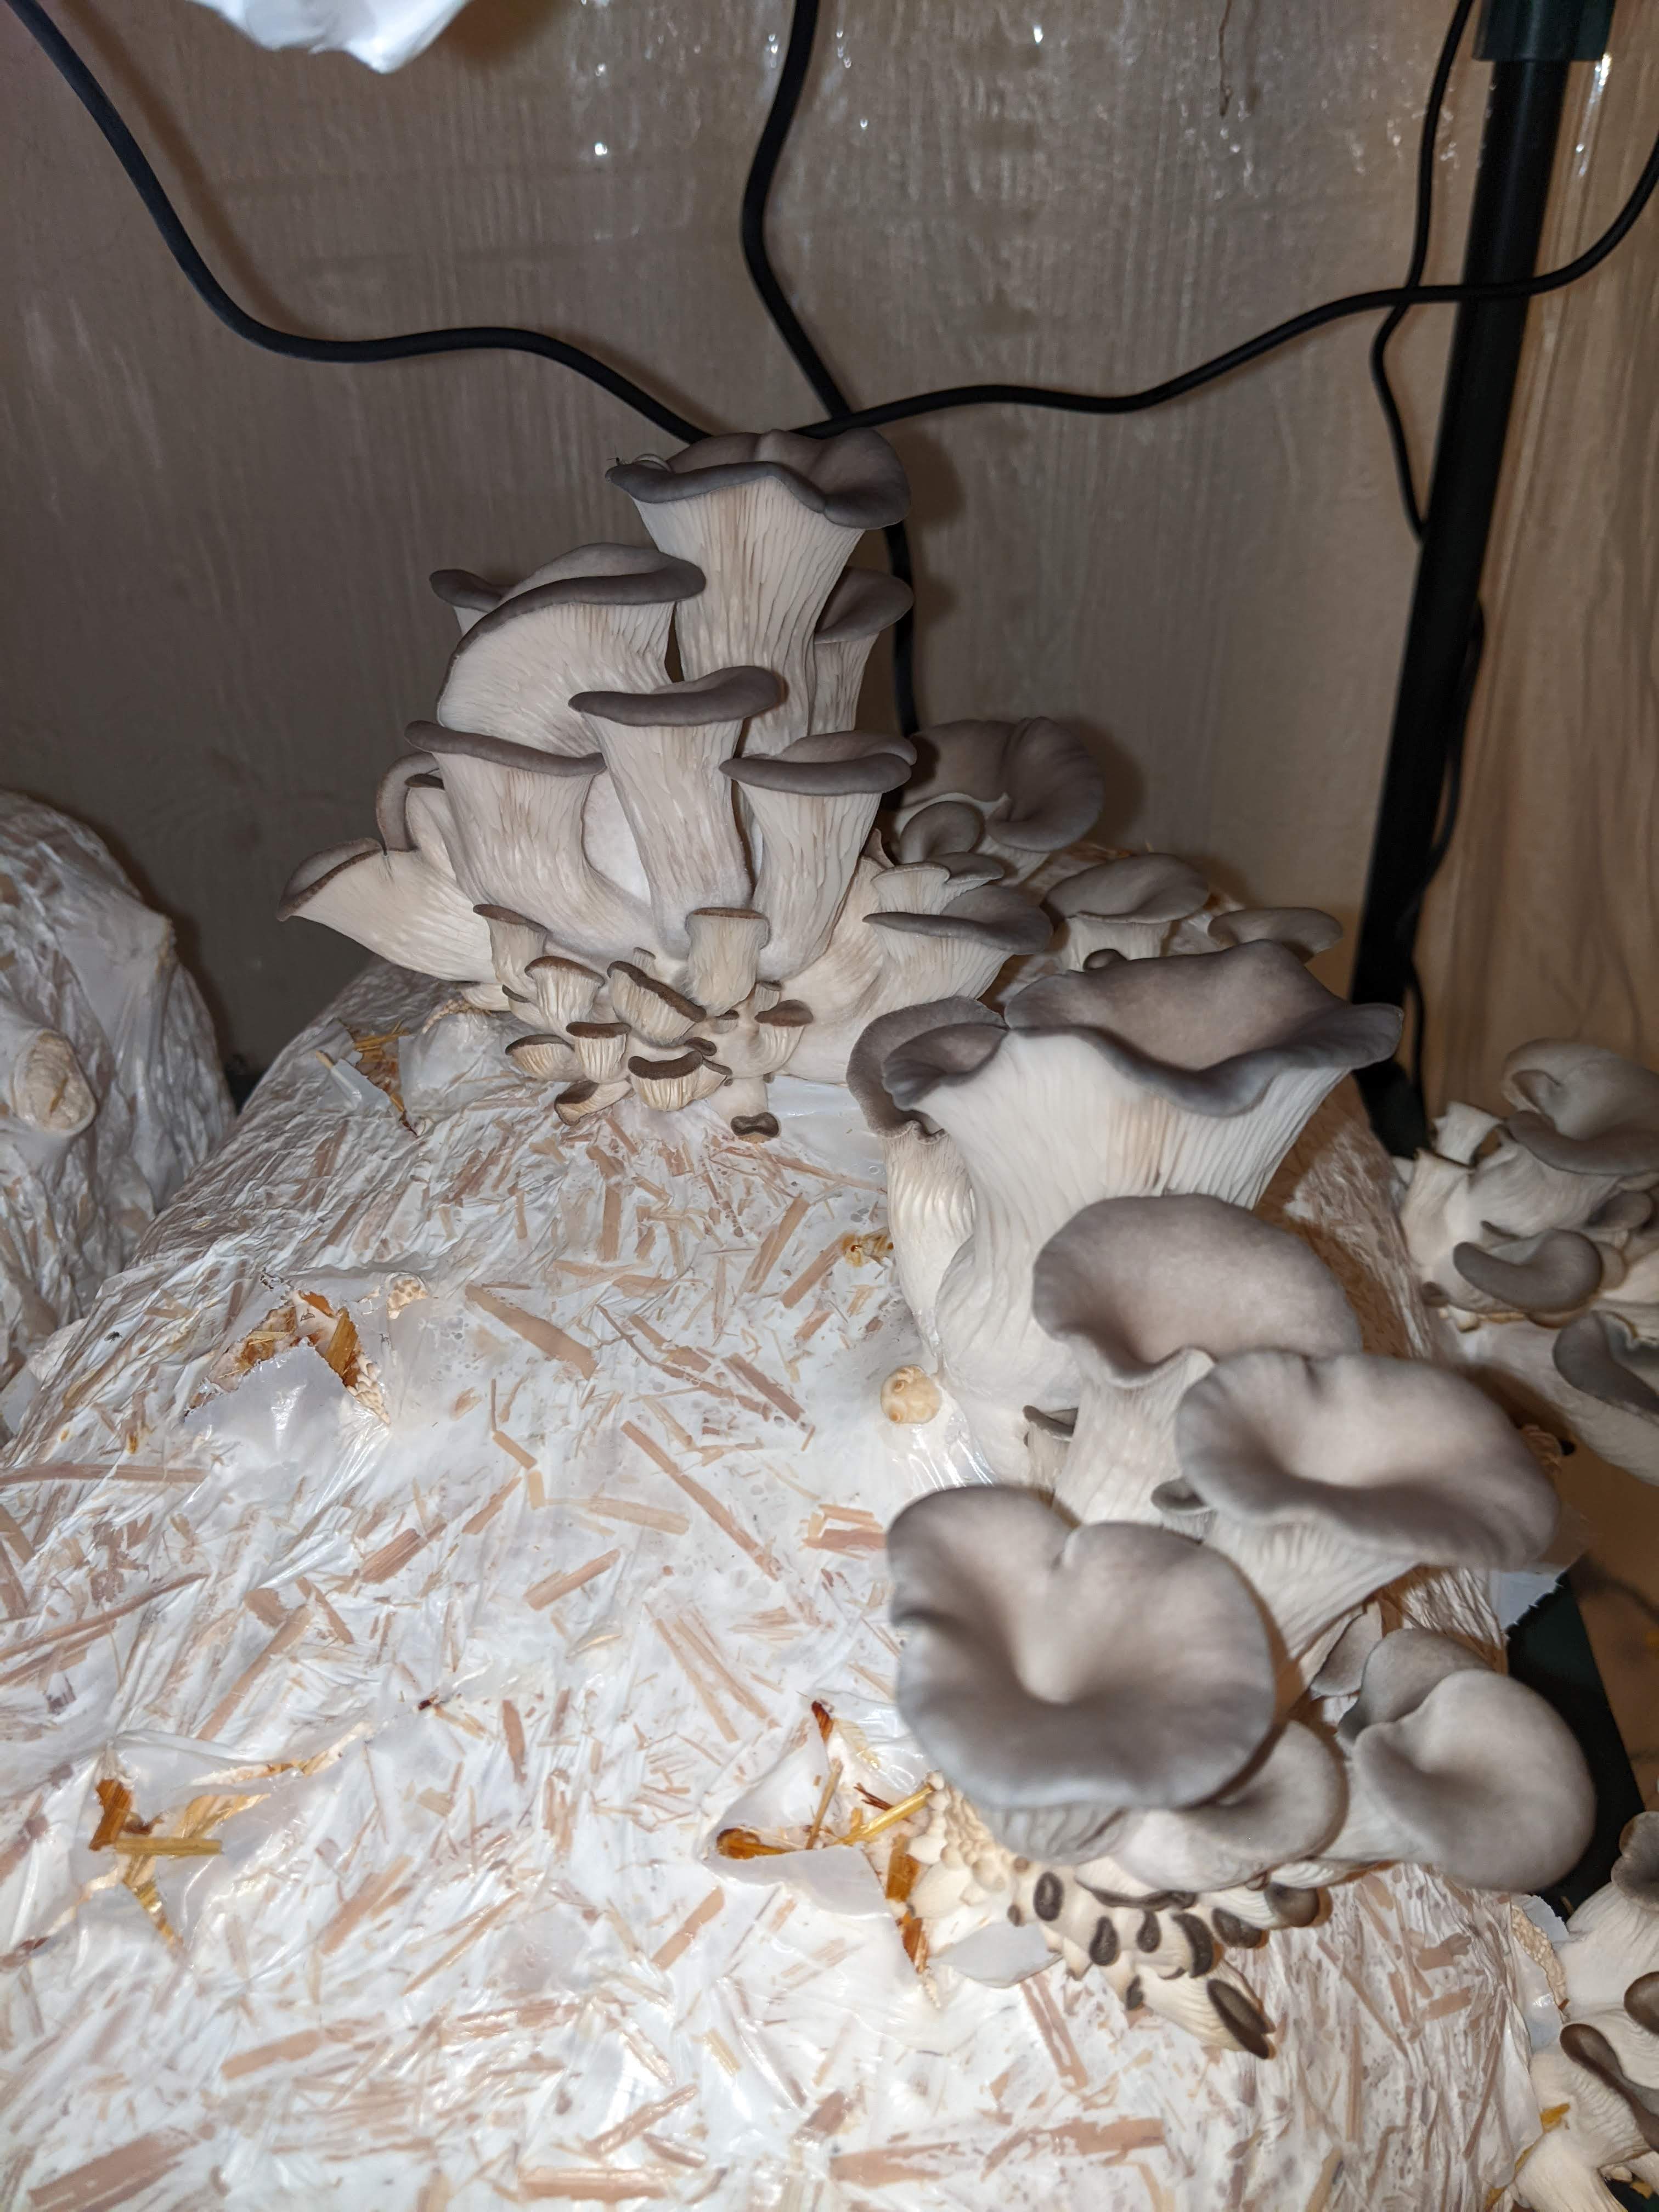
Mature blue oyster mushrooms. (The mushrooms are blue in their early stages, as later pictures will show):
Mushroom cultivation roughly has four stages. These stages expand from pure culture, like mushroom spores, to the substrate that mushrooms will eventually grow out of. Each step can expand exponentially. For instance, a dusting of spores can become 10 ml of liquid culture, 5 lbs of grain spawn, and 50 lbs of fruiting substrate.
Mushrooms are the fruiting body, like an apple, of a larger organism called mycelium. Mycelium grows through carboniferous substrate and digests the material externally, releasing CO2 in the process. Mushrooms grow to release spores when the time is right so the process can start again.
Below is an overview of the process.
Isolating a pure culture: This step can involve starting spores on agar, cloning mushrooms from tissue, or other methods. This step requires a highly sterile environment and good procedure. It also requires specialized equipment. I elect to buy liquid culture as 'spore syringes', which are syringes with an inoculated liquid nutrient.
Growing spawn: For many gourmet mushrooms, grain spawn is the preferred spawn growing method. Generally, you can use any whole grain bought from a feed store. I use whole oats because of their availability in my area. The oats are hydrated by soaking them for 12-24 hours, before being put in specialized bags and pressure sterilized for 2-3 hours. The bags are promptly sealed using an impulse sealer or simple zip ties. The bags are then injected with the liquid culture (or inoculated by other means) and left to grow for 2-4 weeks.
Inoculating fruiting blocks: Mushrooms can be grown on a variety of substrates. I have been making supplemented sawdust bags because this is much easier to work with indoors than messy straw. I used straw once and will do everything I can to avoid using it again! Much like with the grain spawn, sawdust is put in specialized bags and is pressure sterilized. Then the bags are opened and broken up grain spawn is added. They are left to grow for another 2-4 weeks.
Fruiting: The final step in the process is to start fruiting conditions. This typically involves exposing the fruiting blocks to oxygen by putting cuts in the otherwise sealed bag. The blocks are kept in an environment with high airflow and high humidity, a tricky combination to maintain. I have a grow tent with a humidifier and fan. The fan is set to run intermittently and the humidifier is hooked up to a humidistat. Exposed to oxygen and humidity, the mushrooms start to 'pin' within a week or two. After pinning, the mushrooms often 'explode' in size over the next week and are ready for harvest.
This process can take many more forms than the explanation above. Hobbyists can start at any step along the way, including buying ready-to-fruit blocks. I personally start just after step 1 by buying an isolated culture off the internet.
Isolating a pure culture
This step requires the most sterile environment and procedure, so I purchase a pure culture from The Mycelium Emporium. They have high-quality cultures at great prices.
Growing Spawn
I will go into more details about this step at a later date. For now, I will just show some pictures with quick descriptions.
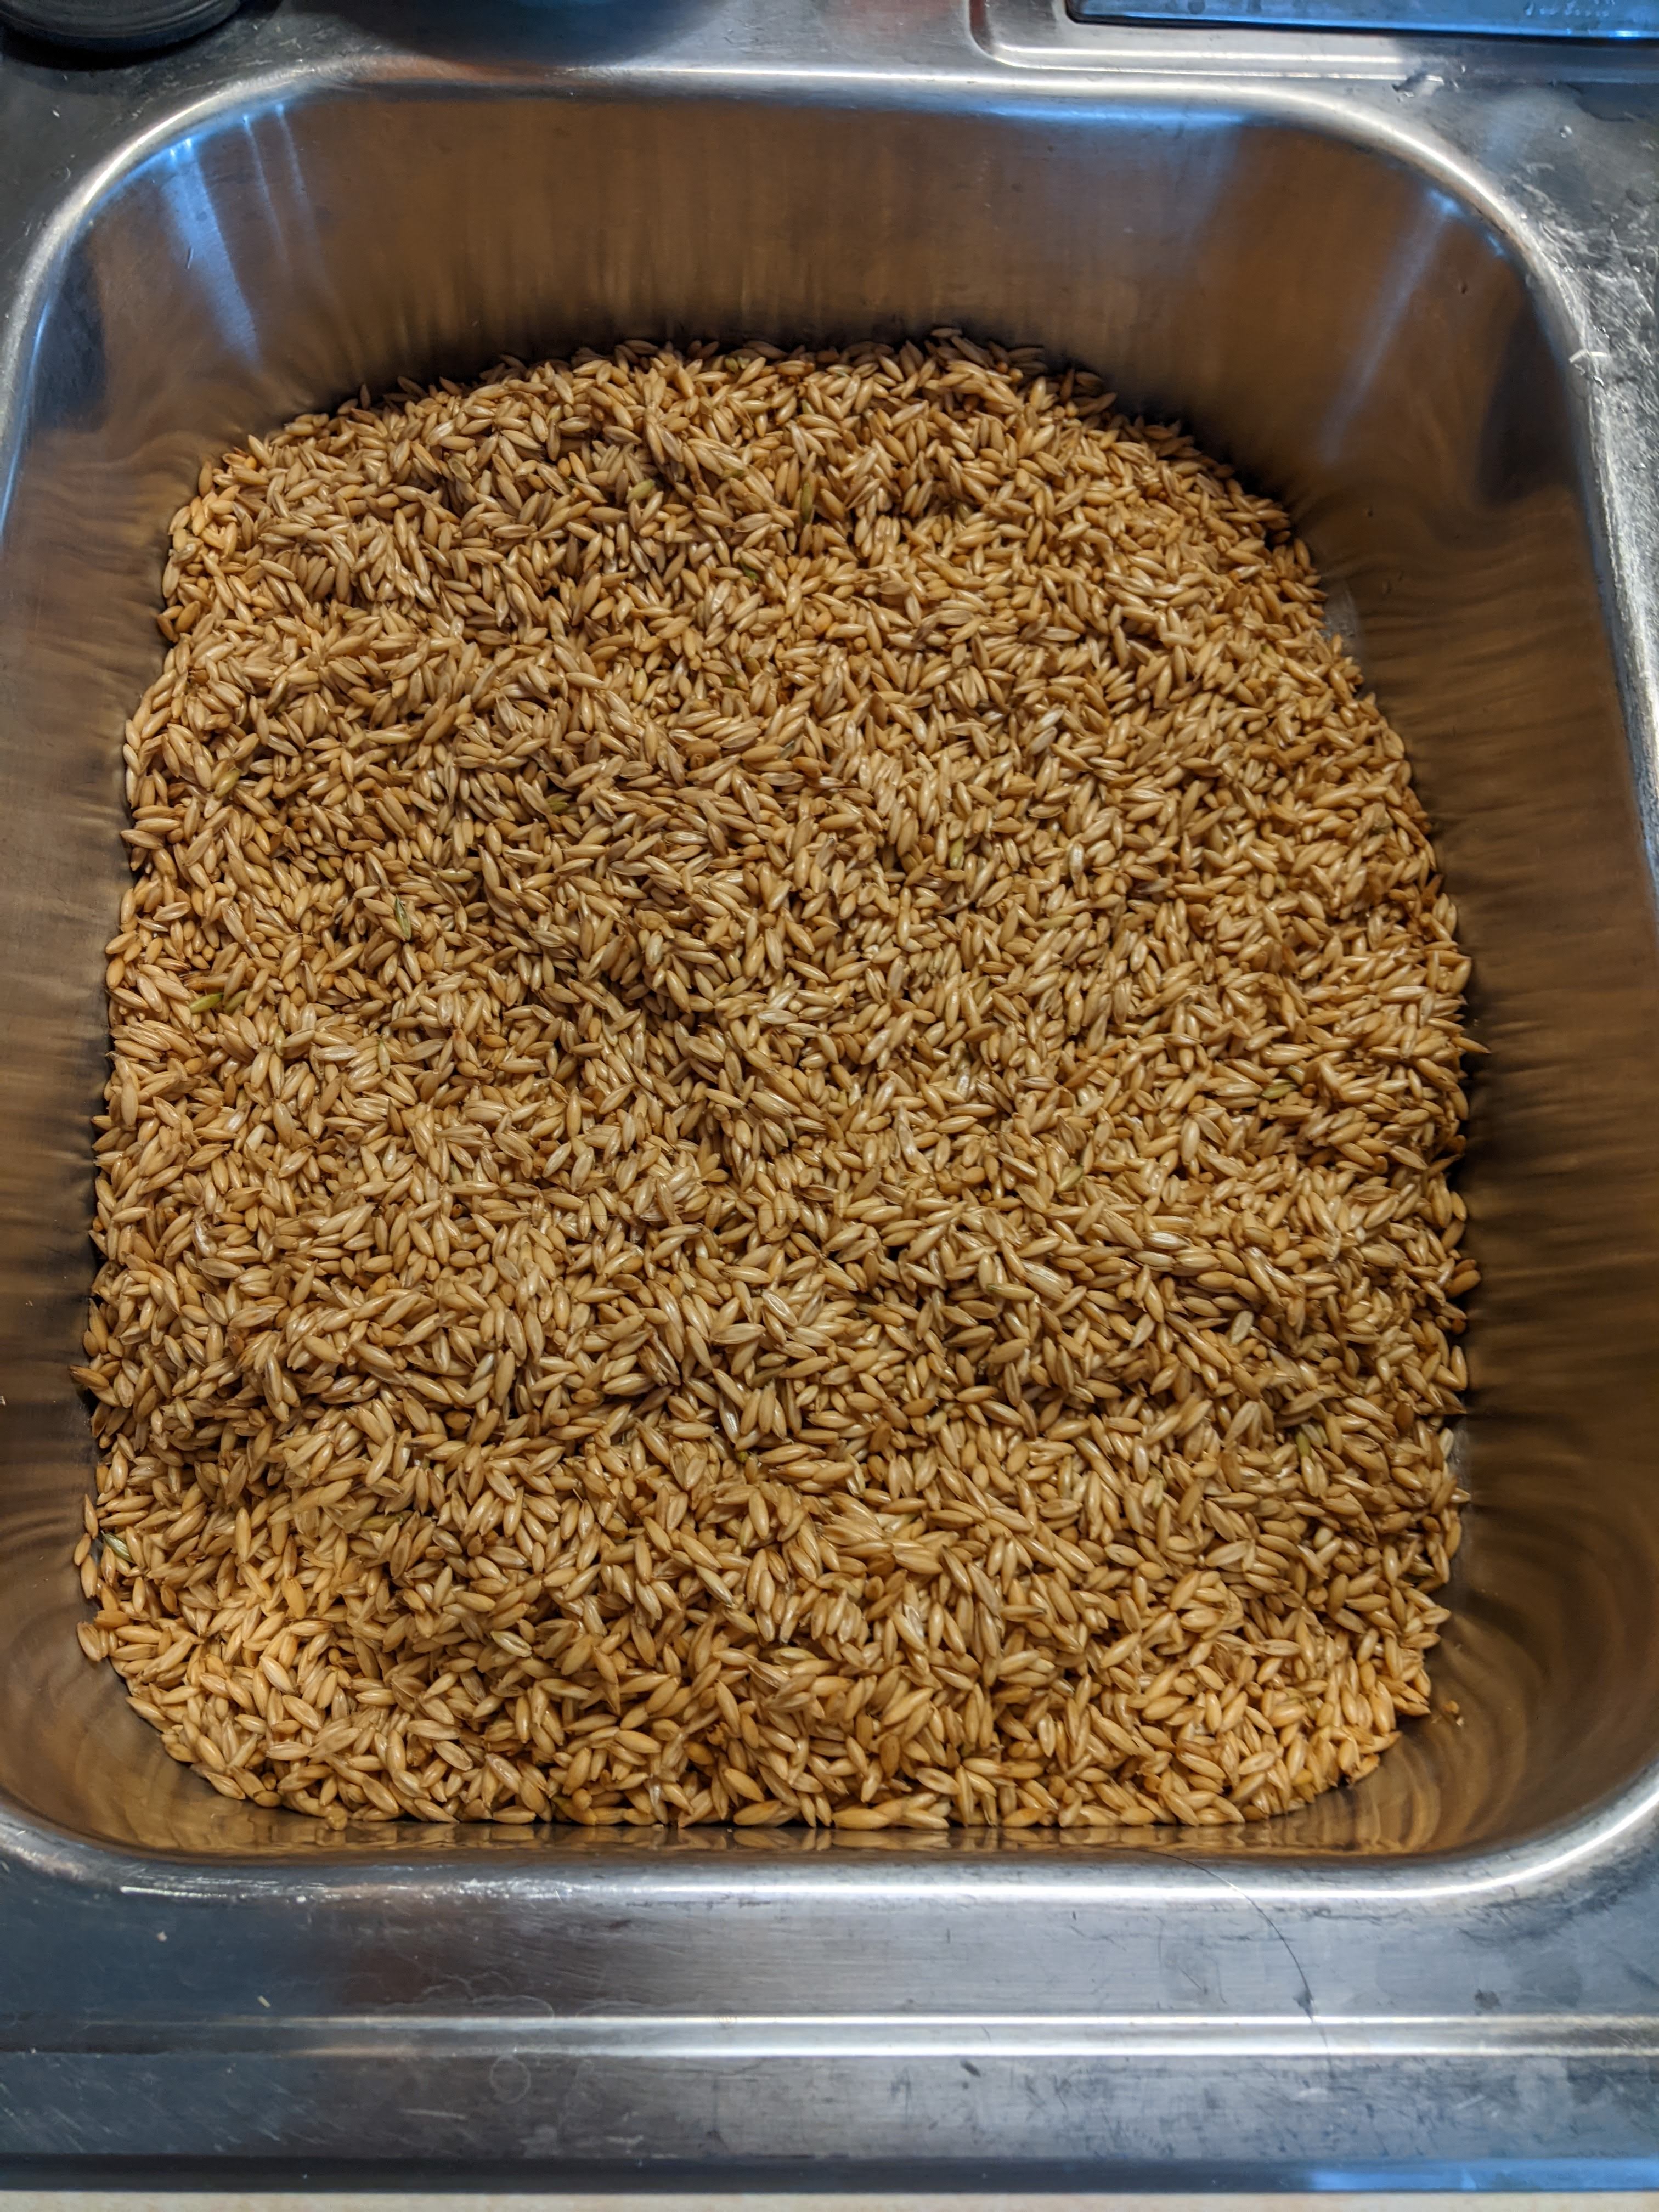
Here I'm draining the oats in my sink after soaking them for 24 hours. For six bags of grain spawn, I used a little over ~2.5 gallons of dry oats. Any extra hydrated oats are given away for animals.
The bags are pressure cooked for 2-3 hours at 15 PSI. This sterilization attempts to kill all living organisms and spores (although complete sterilization is impossible).
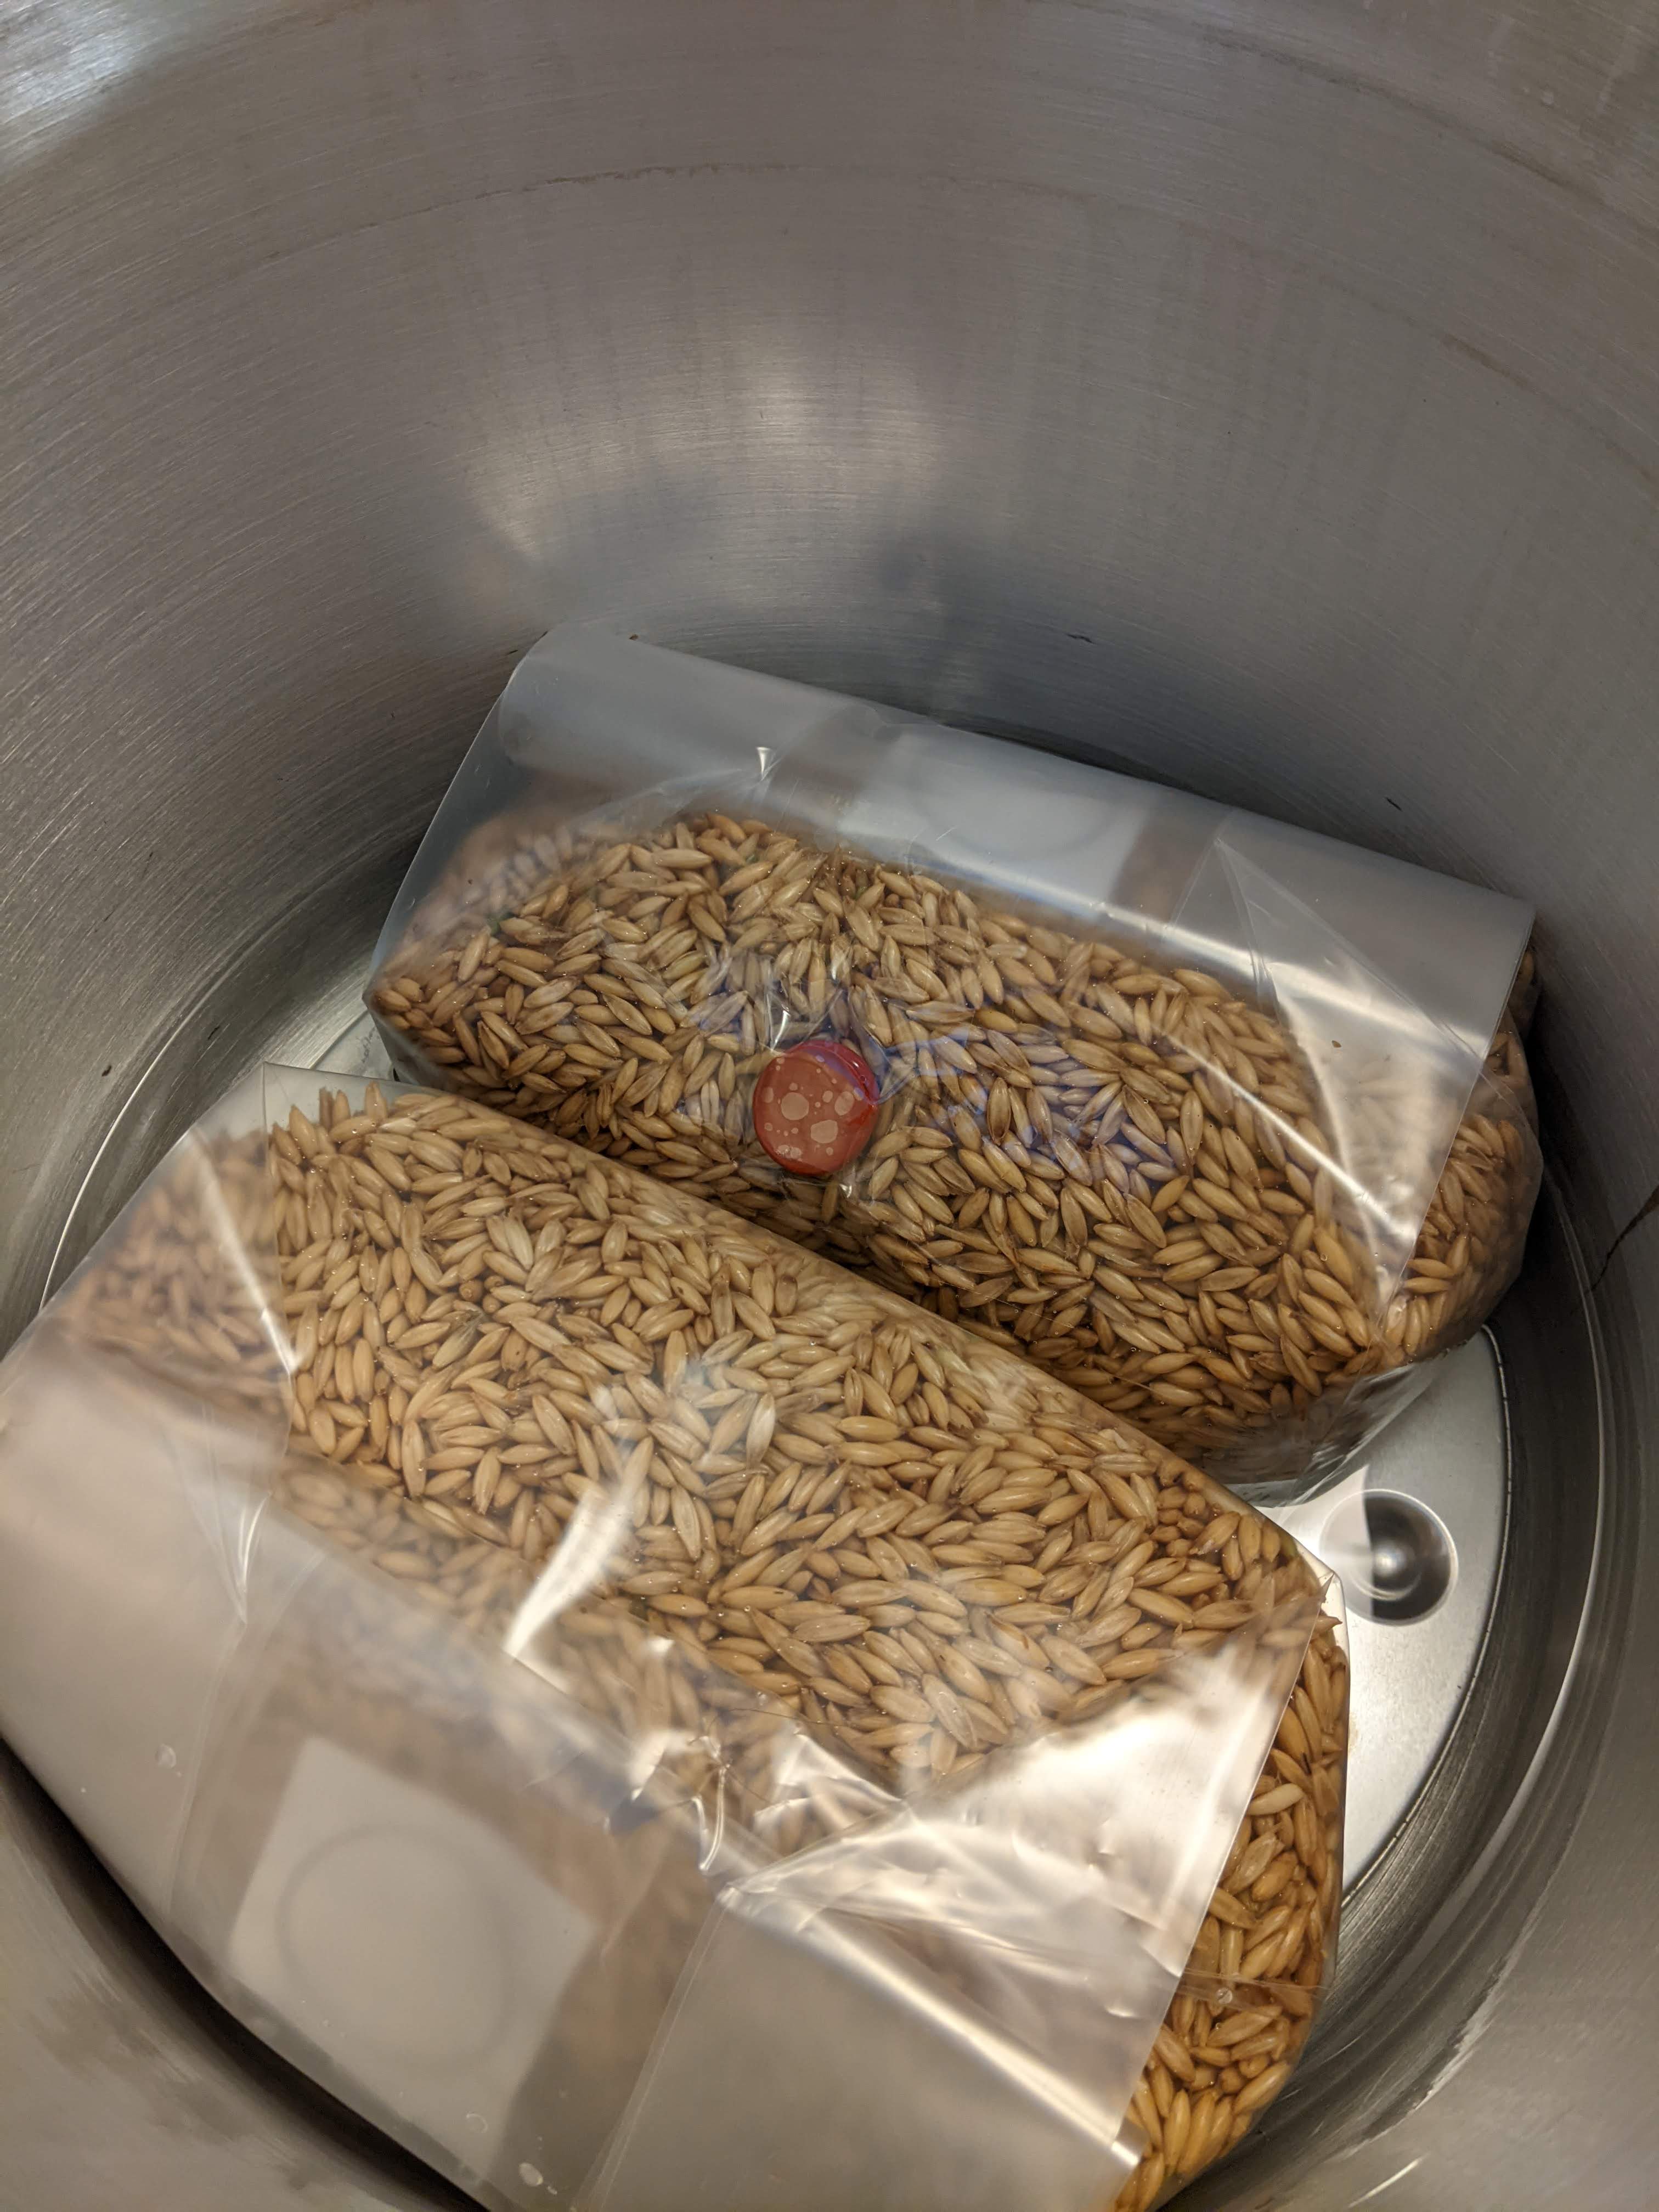
The oats are then 'sealed' (in my case, with a zip tie) and injected with the liquid culture syringe. Only ~2 ml of liquid is injected into each bag so that one syringe can inoculate 4-6 bags of grain. After 7-14 days, the first signs of growth emerge. The white circle on this bag is the start of mycelium.
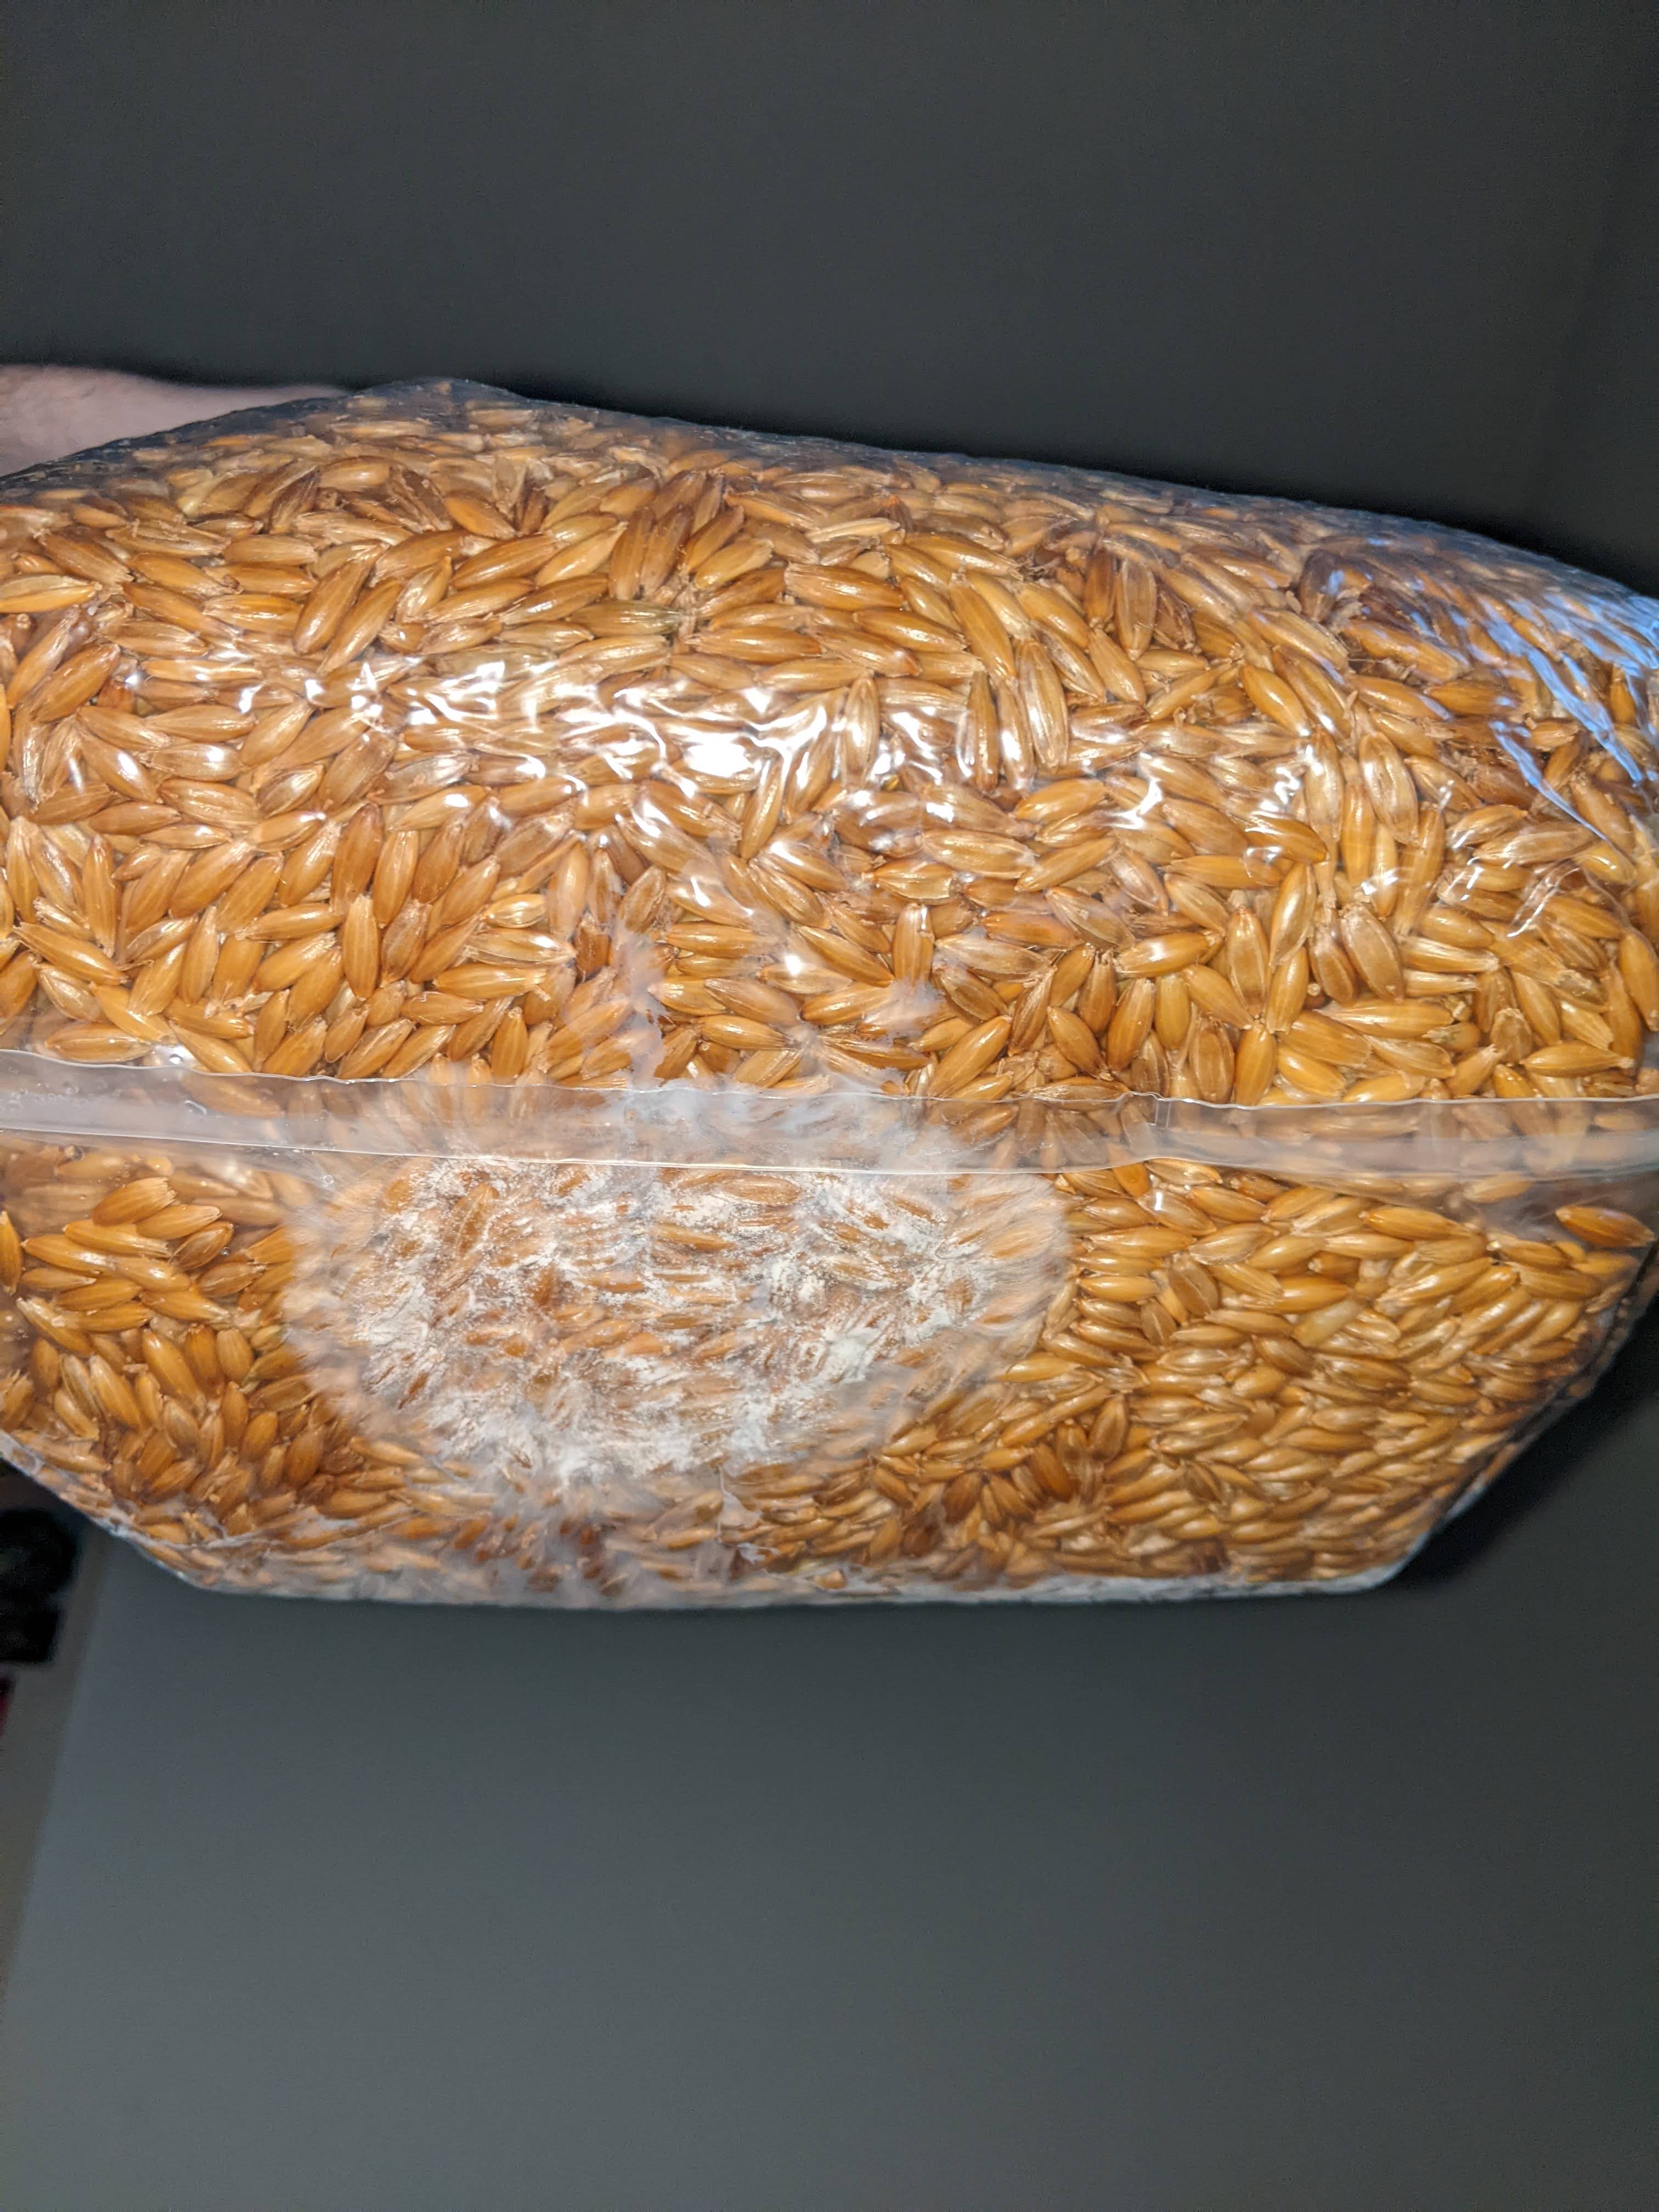
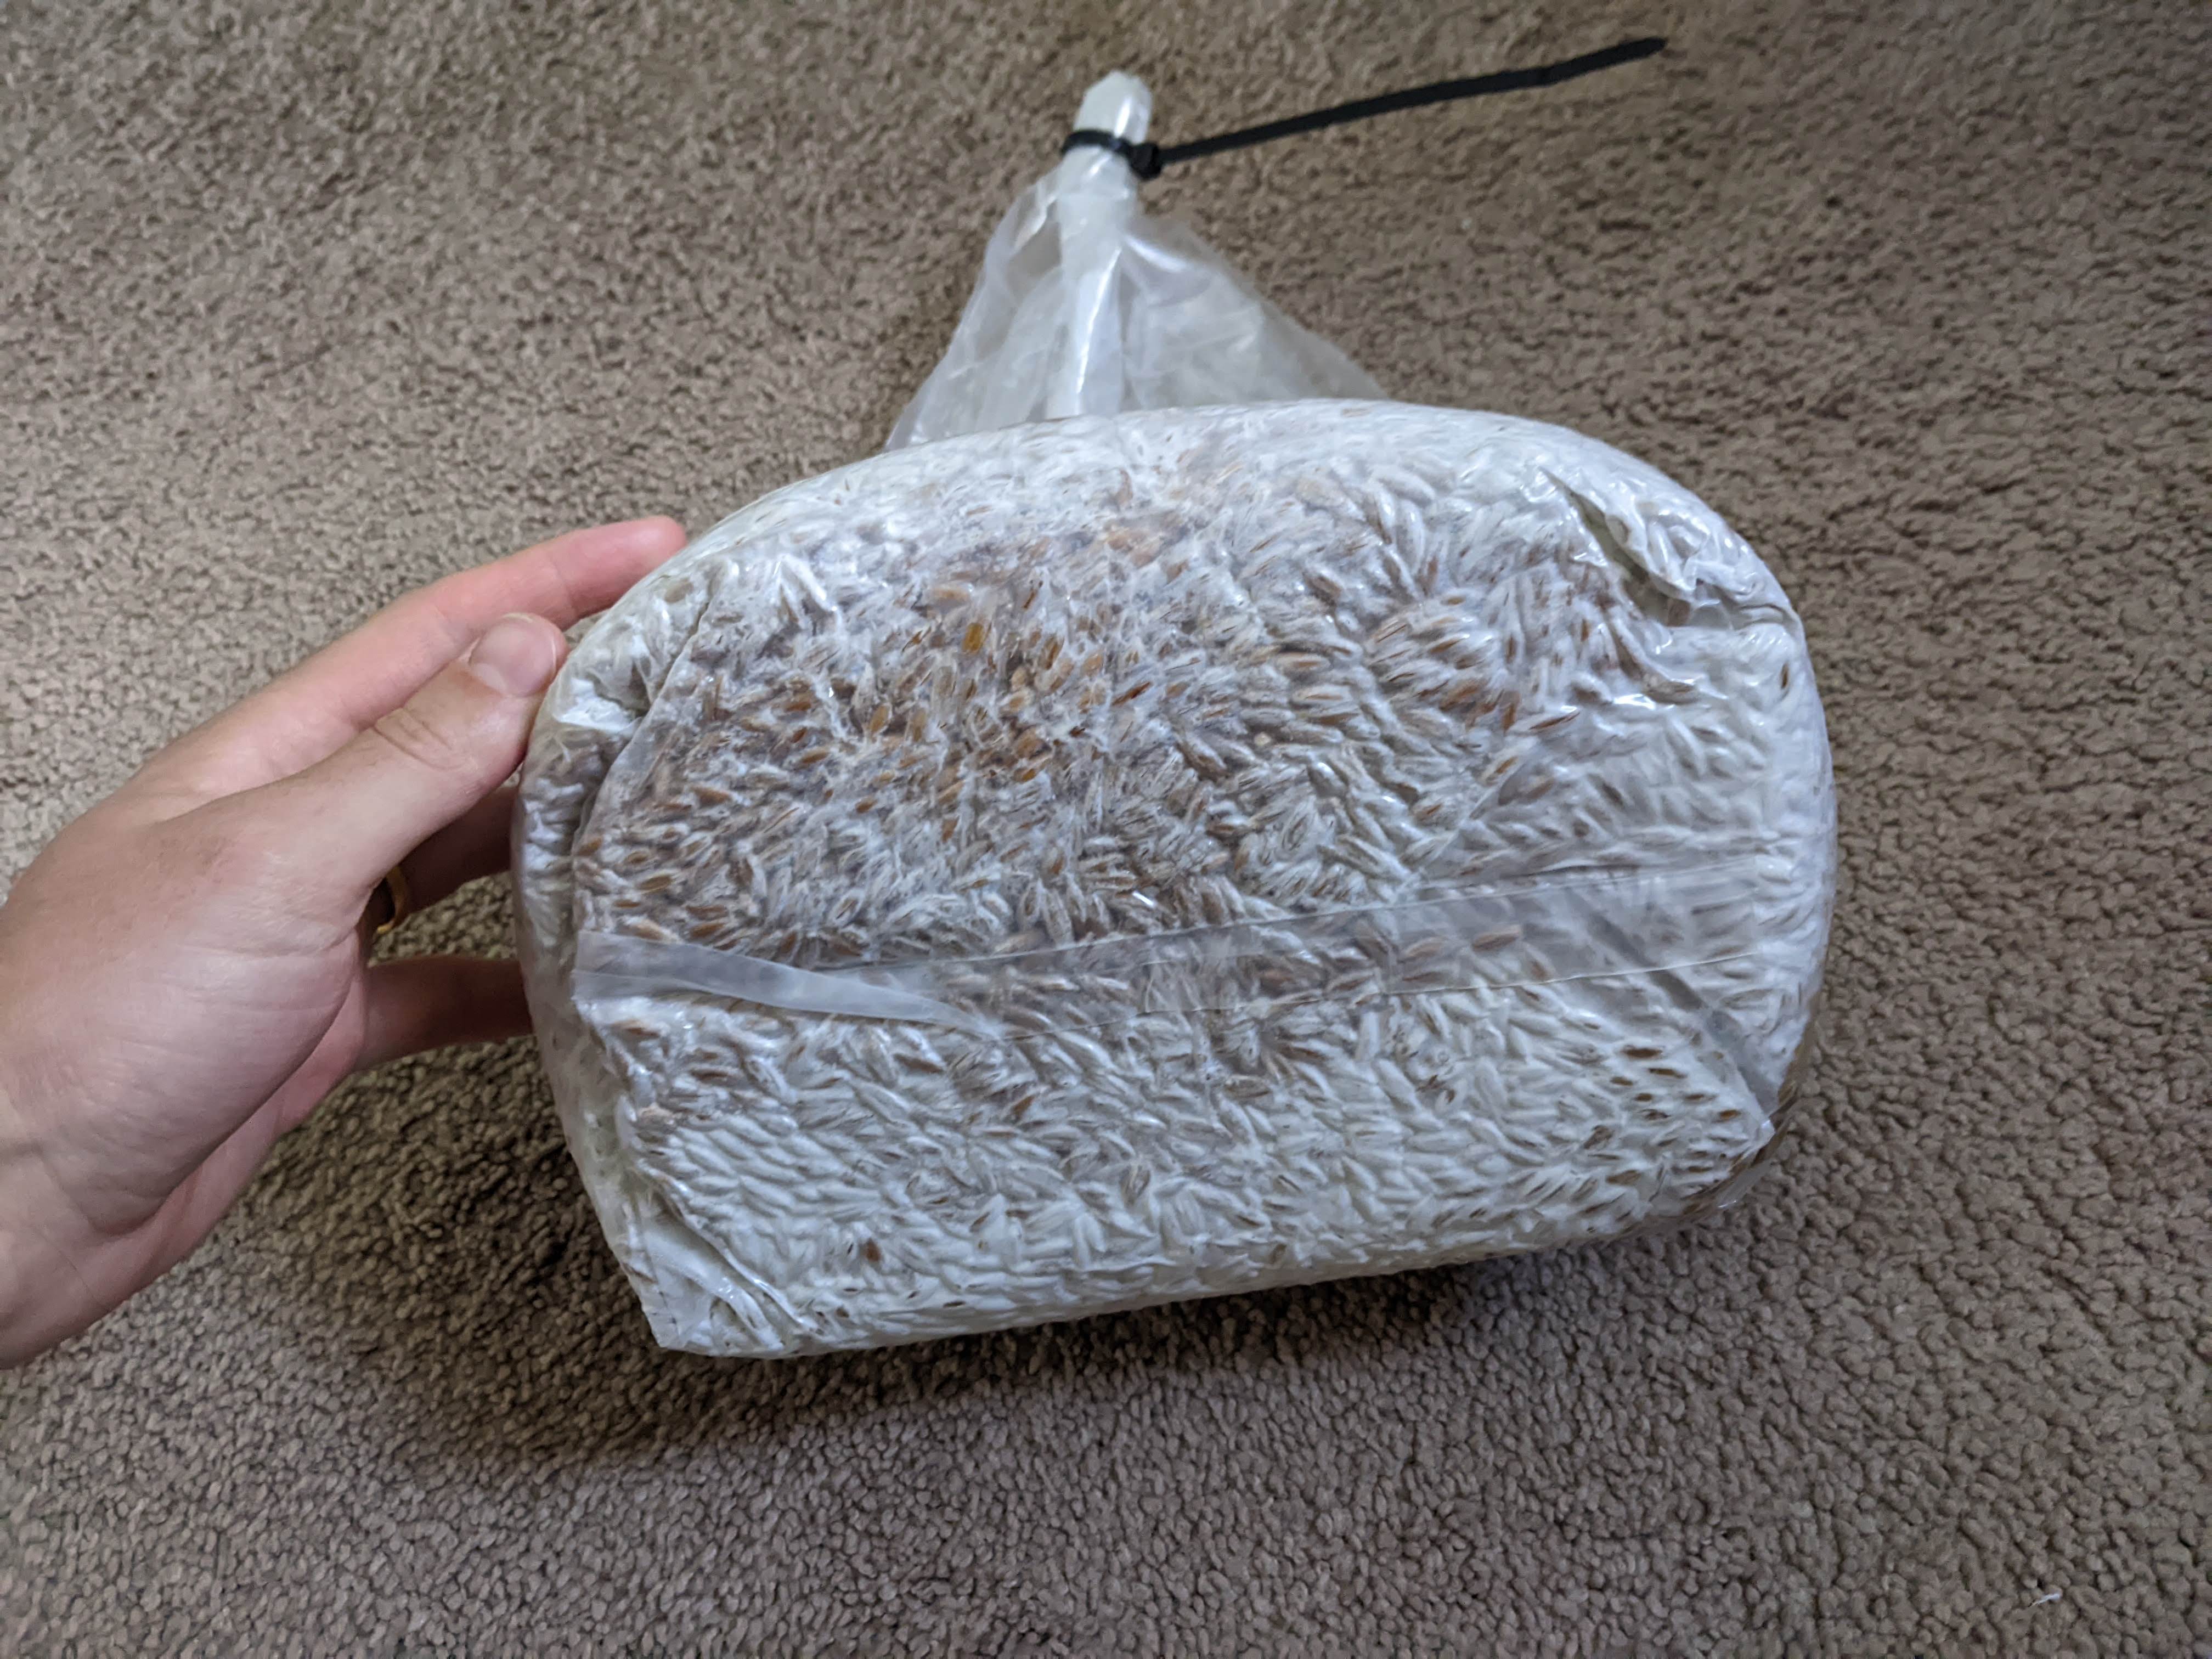
After the bag is 50-75% colonized, it is broken up and shaken (without breaking the seal). This helps the grain be fully colonized. The following picture is about 1 month from inoculating the bag and shows full colonization (this spawn is Blue Oyster, which has a particularly dense looking mycelium).
Preparation of Fruiting (Sawdust) Blocks
I generally follow Freshcap guide to Sawdust Blocks, although I have made some alterations to Freshcap's recipe. This process is pretty similar to the previous step (growing spawn). I will be including some extra details in this step, and I am doing it today (10/28/2023) and my memory is fresh.
Freshcap calls for a little more water in their recipe, but I've had issues with my blocks being over-hydrated. Mushrooms are mostly water, so hydration is important. That being said, under hydration is preferable to over hydration. Over hydration makes the spawn slow to colonize and can lead to bacterial and parasitic contaminations. I will include a picture at the bottom of a sawdust bag where this happened.
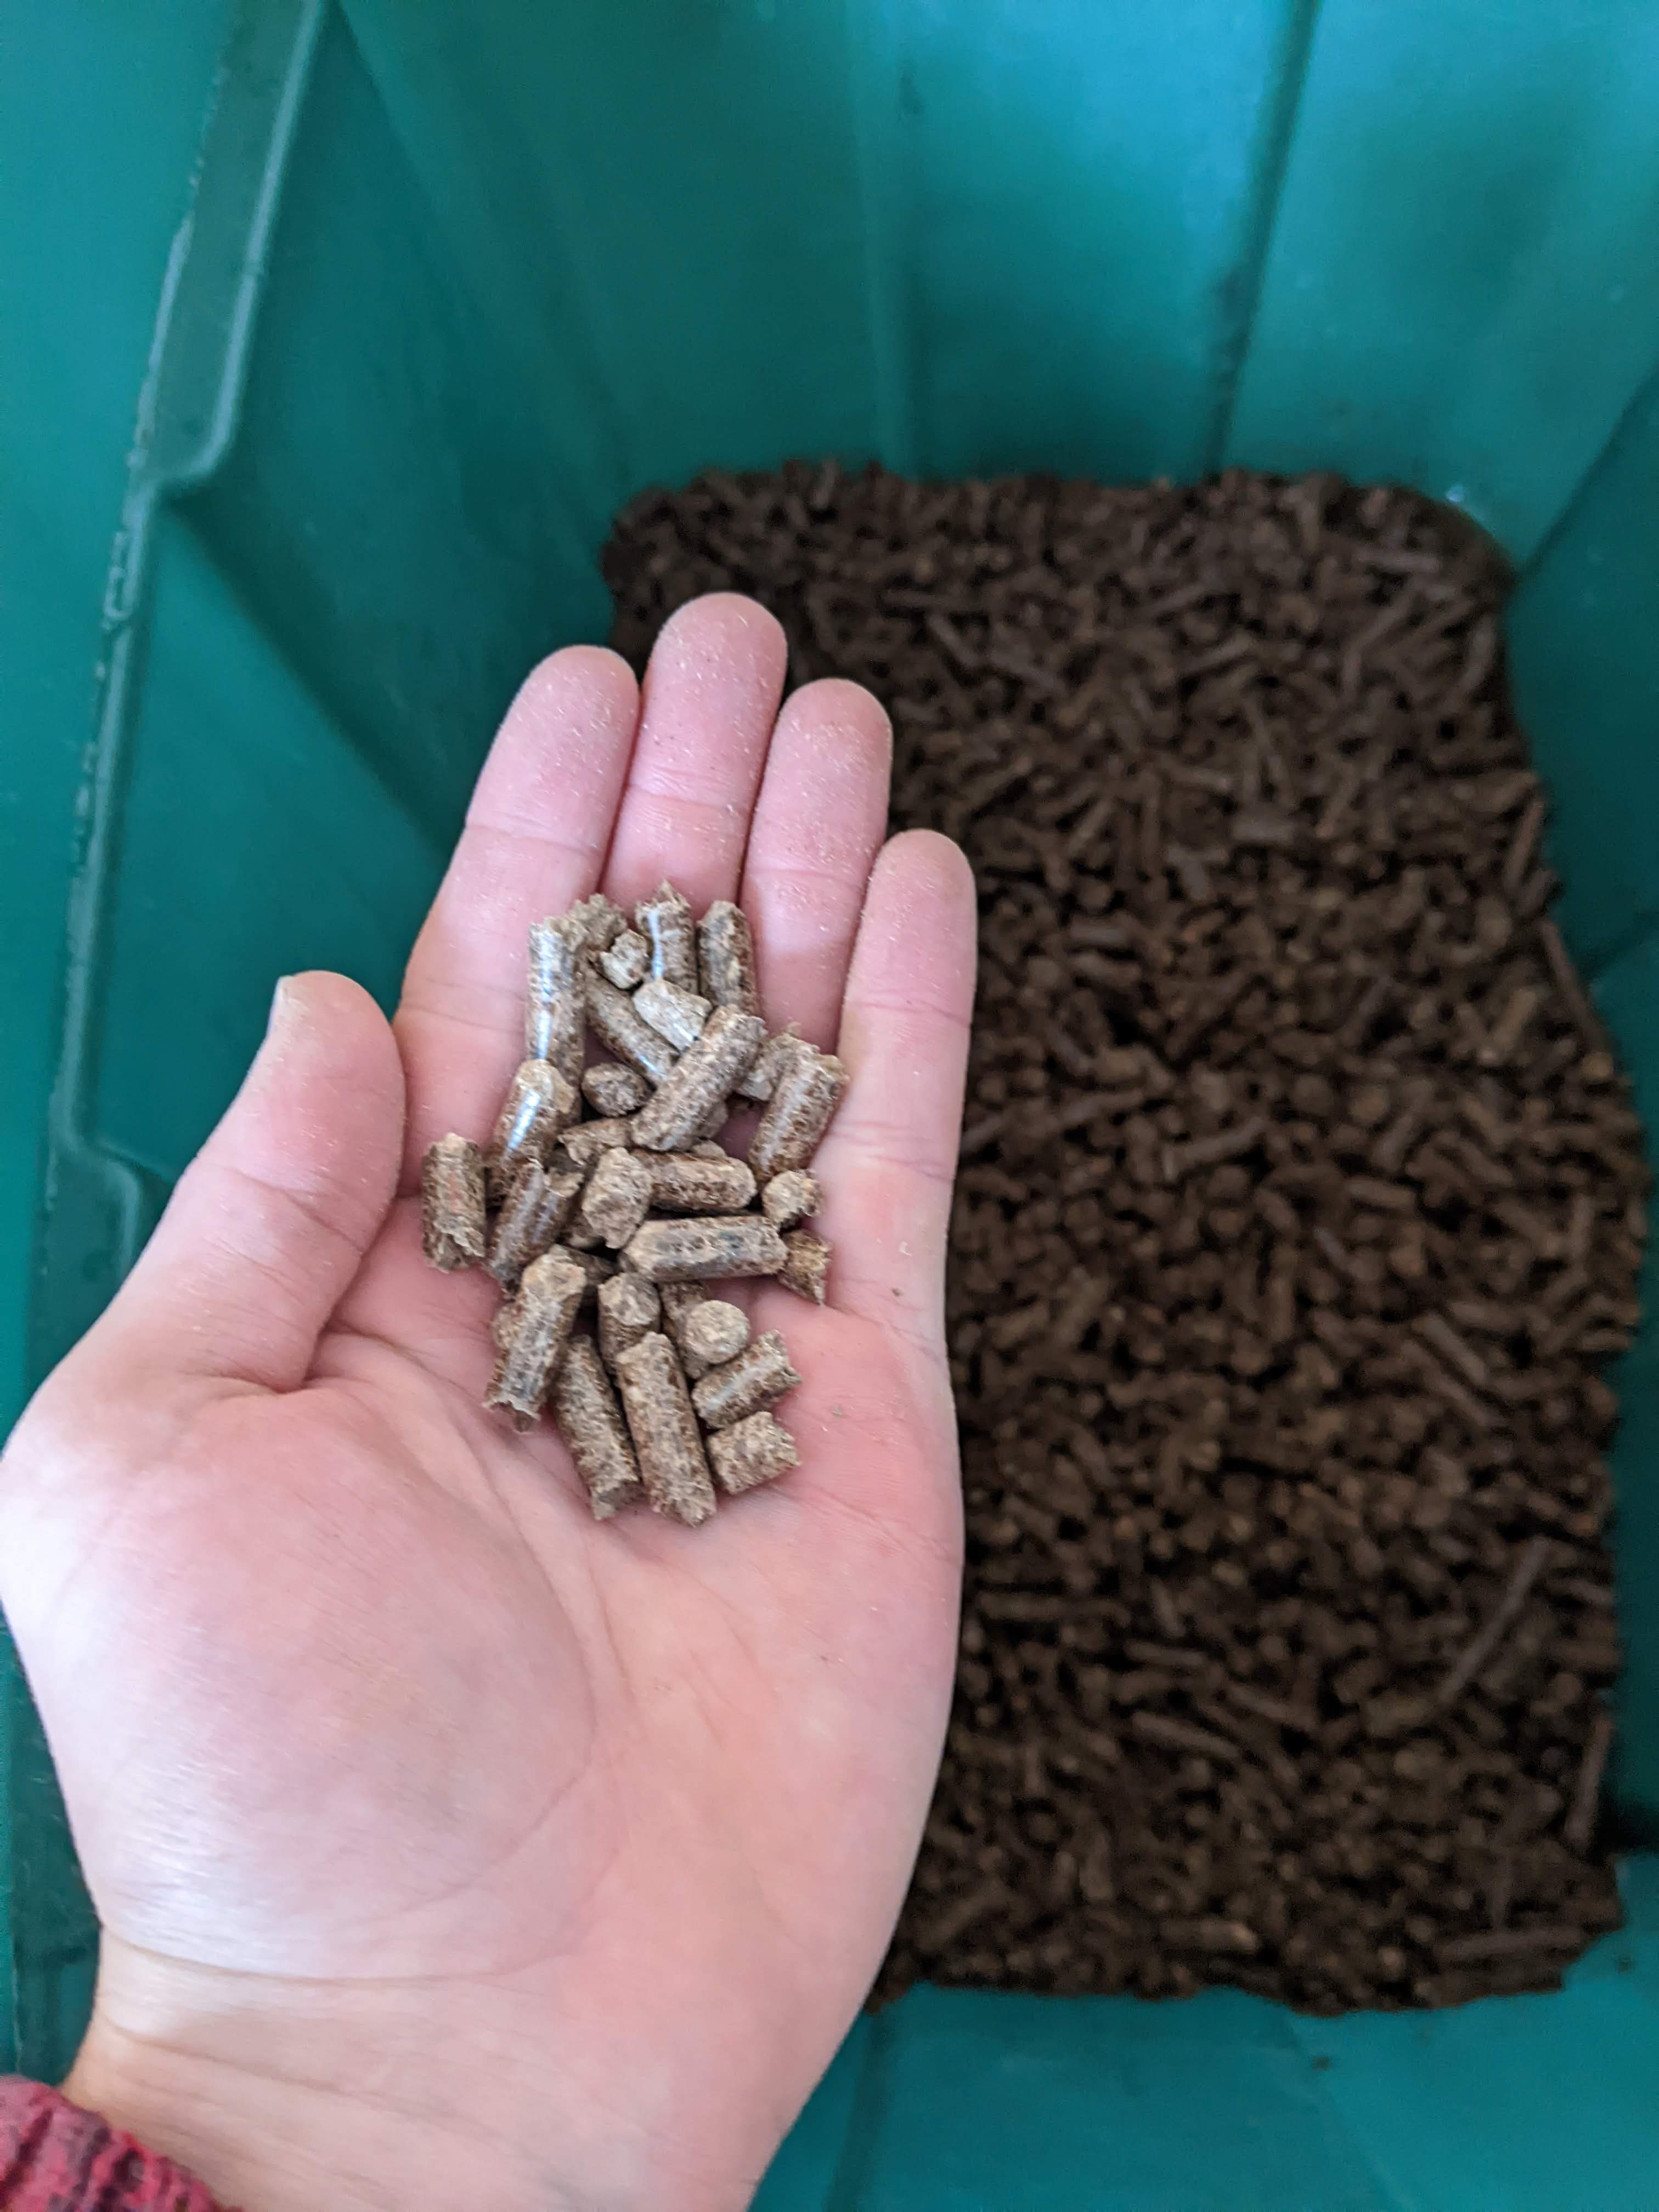
The most readily-available form of sawdust are hardwood fuel pellets. In my area (Laramie, WY), most fuel pellets are soft wood due to the availability of pine. I have to buy pellets for smokers. These are more expensive than fuel pellets, but they will work.
The pellets are mixed with water and allowed to hydrate. They hydrate quickly even with room-temperature water. I mix them and break them up with my hands to get them as evenly mixed and hydrated as possible. Finally, wheat bran is added to add nutrients to the mix.
Today, I am starting Lions Mane sawdust blocks. I completely forgot to add bran, so I may expect lower yields or slower colonization, but they should hopefully still grow. I will add a note later about how un-supplemented sawdust works.
My recipe is largely the same as Freshcap's, just with less water:
For 20 lbs of substrate:
20 cups of hardwood pellets. Measured with a large measuring cup. The pellets obviously take up lots of volume because they don't fill space well. This measure is approximate, and I will switch to using mass when I find a good scale.
21 cups of water. Freshcap calls for around 24 cups of water, but I was having issues with excess hydration. 20 cups of water felt pretty dry, but the sawdust was fully hydrated. 21 cups felt a little clammy, but the sawdust became formable and friable, like good soil.
5 cups of wheat bran. Wheat bran can apparently be bought inexpensively at feed stores, but I had to buy it in bulk from the co-op (shout out to Big Hollow, the pride of Laramie).
I measure the pellets into a large tote, add water, and let everything sit for ~15 minutes. Then I begin to break up the pellets and mix everything. I mix for around 5 full minutes to ensure that the hydration is even. Finally, add the bran and mix again thoroughly. I excluded the bran by accident, so we'll see how necessary it is.
The bags are pressure sterilized like the grain spawn for 2.5 hours. They are left to cool for several hours or overnight. They should be at most warm when they are inoculated with grain spawn. The grain spawn is broken up and added to the bags with semi-sterile procedure. I inoculate my sawdust in the open air, using ample 70% isopropyl on all surfaces, tools, and my hands. The open air is full of spores and other contaminants, so this is a far cry from true sterility. Doing your best to be sterile is still important; I had a number of oyster sawdust bags lost to contamination.
After inoculation, the bags were sealed with zip ties and left to colonize in a dark room.
After only a couple of days, you should see signs of colonization.

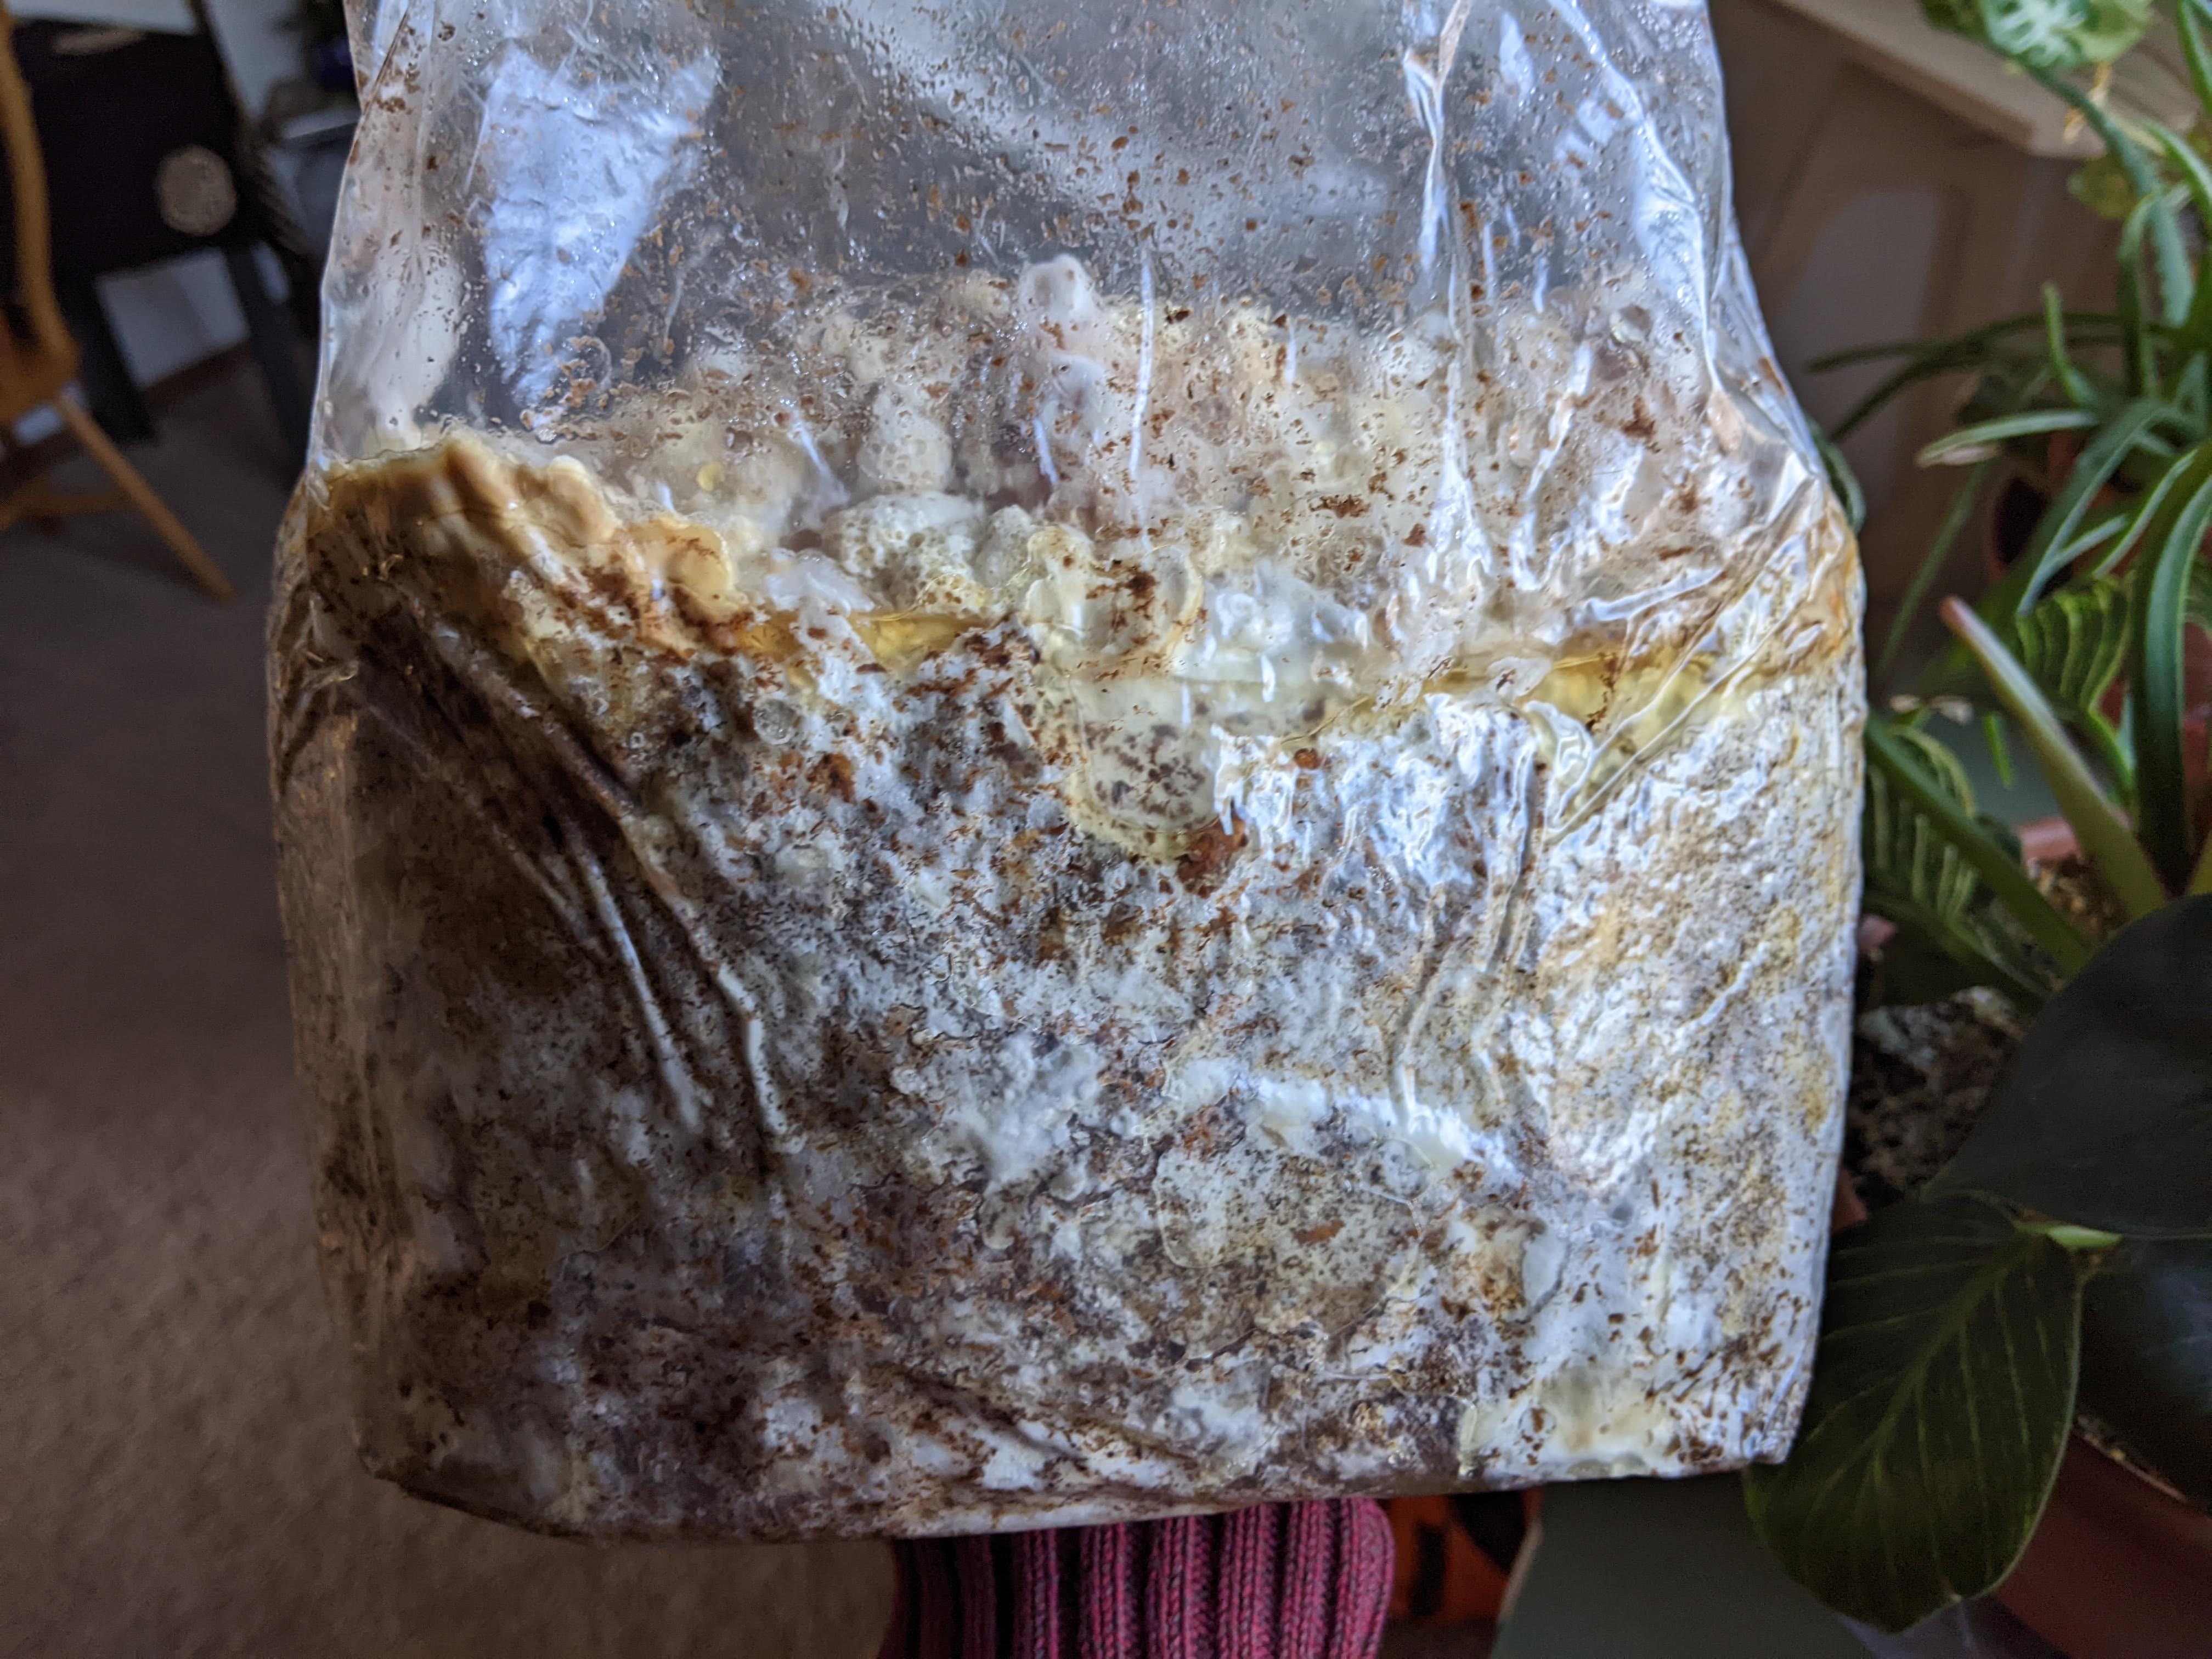
The bags will continue to colonize for 2-4 weeks, depending on how vigorous the spawn is. Below is a picture of fully-colonized blue oyster sawdust. Unfortunately, this was the batch that was over-hydrated and contaminated. Yellow liquid is not always a bad sign, but in this case, it seems to originate from a fungal infection called 'wet bubble.' Wet bubble will not hurt people, but the batch should be thrown away to prevent future batches from having the same contamination.
Fruiting
Fruiting is, of course, the most exciting part of the process. The first batch of blue oysters that I grew were grown indoors on straw. Unlike sawdust, straw is merely pasteurized rather than sterilized. Pasteurization involves low heat (160-180 F) for 1-2 hours. This gives the mushrooms a 'head start' against competitors. Dealing with chopped straw indoors is a huge mess, and I don't recommend it.
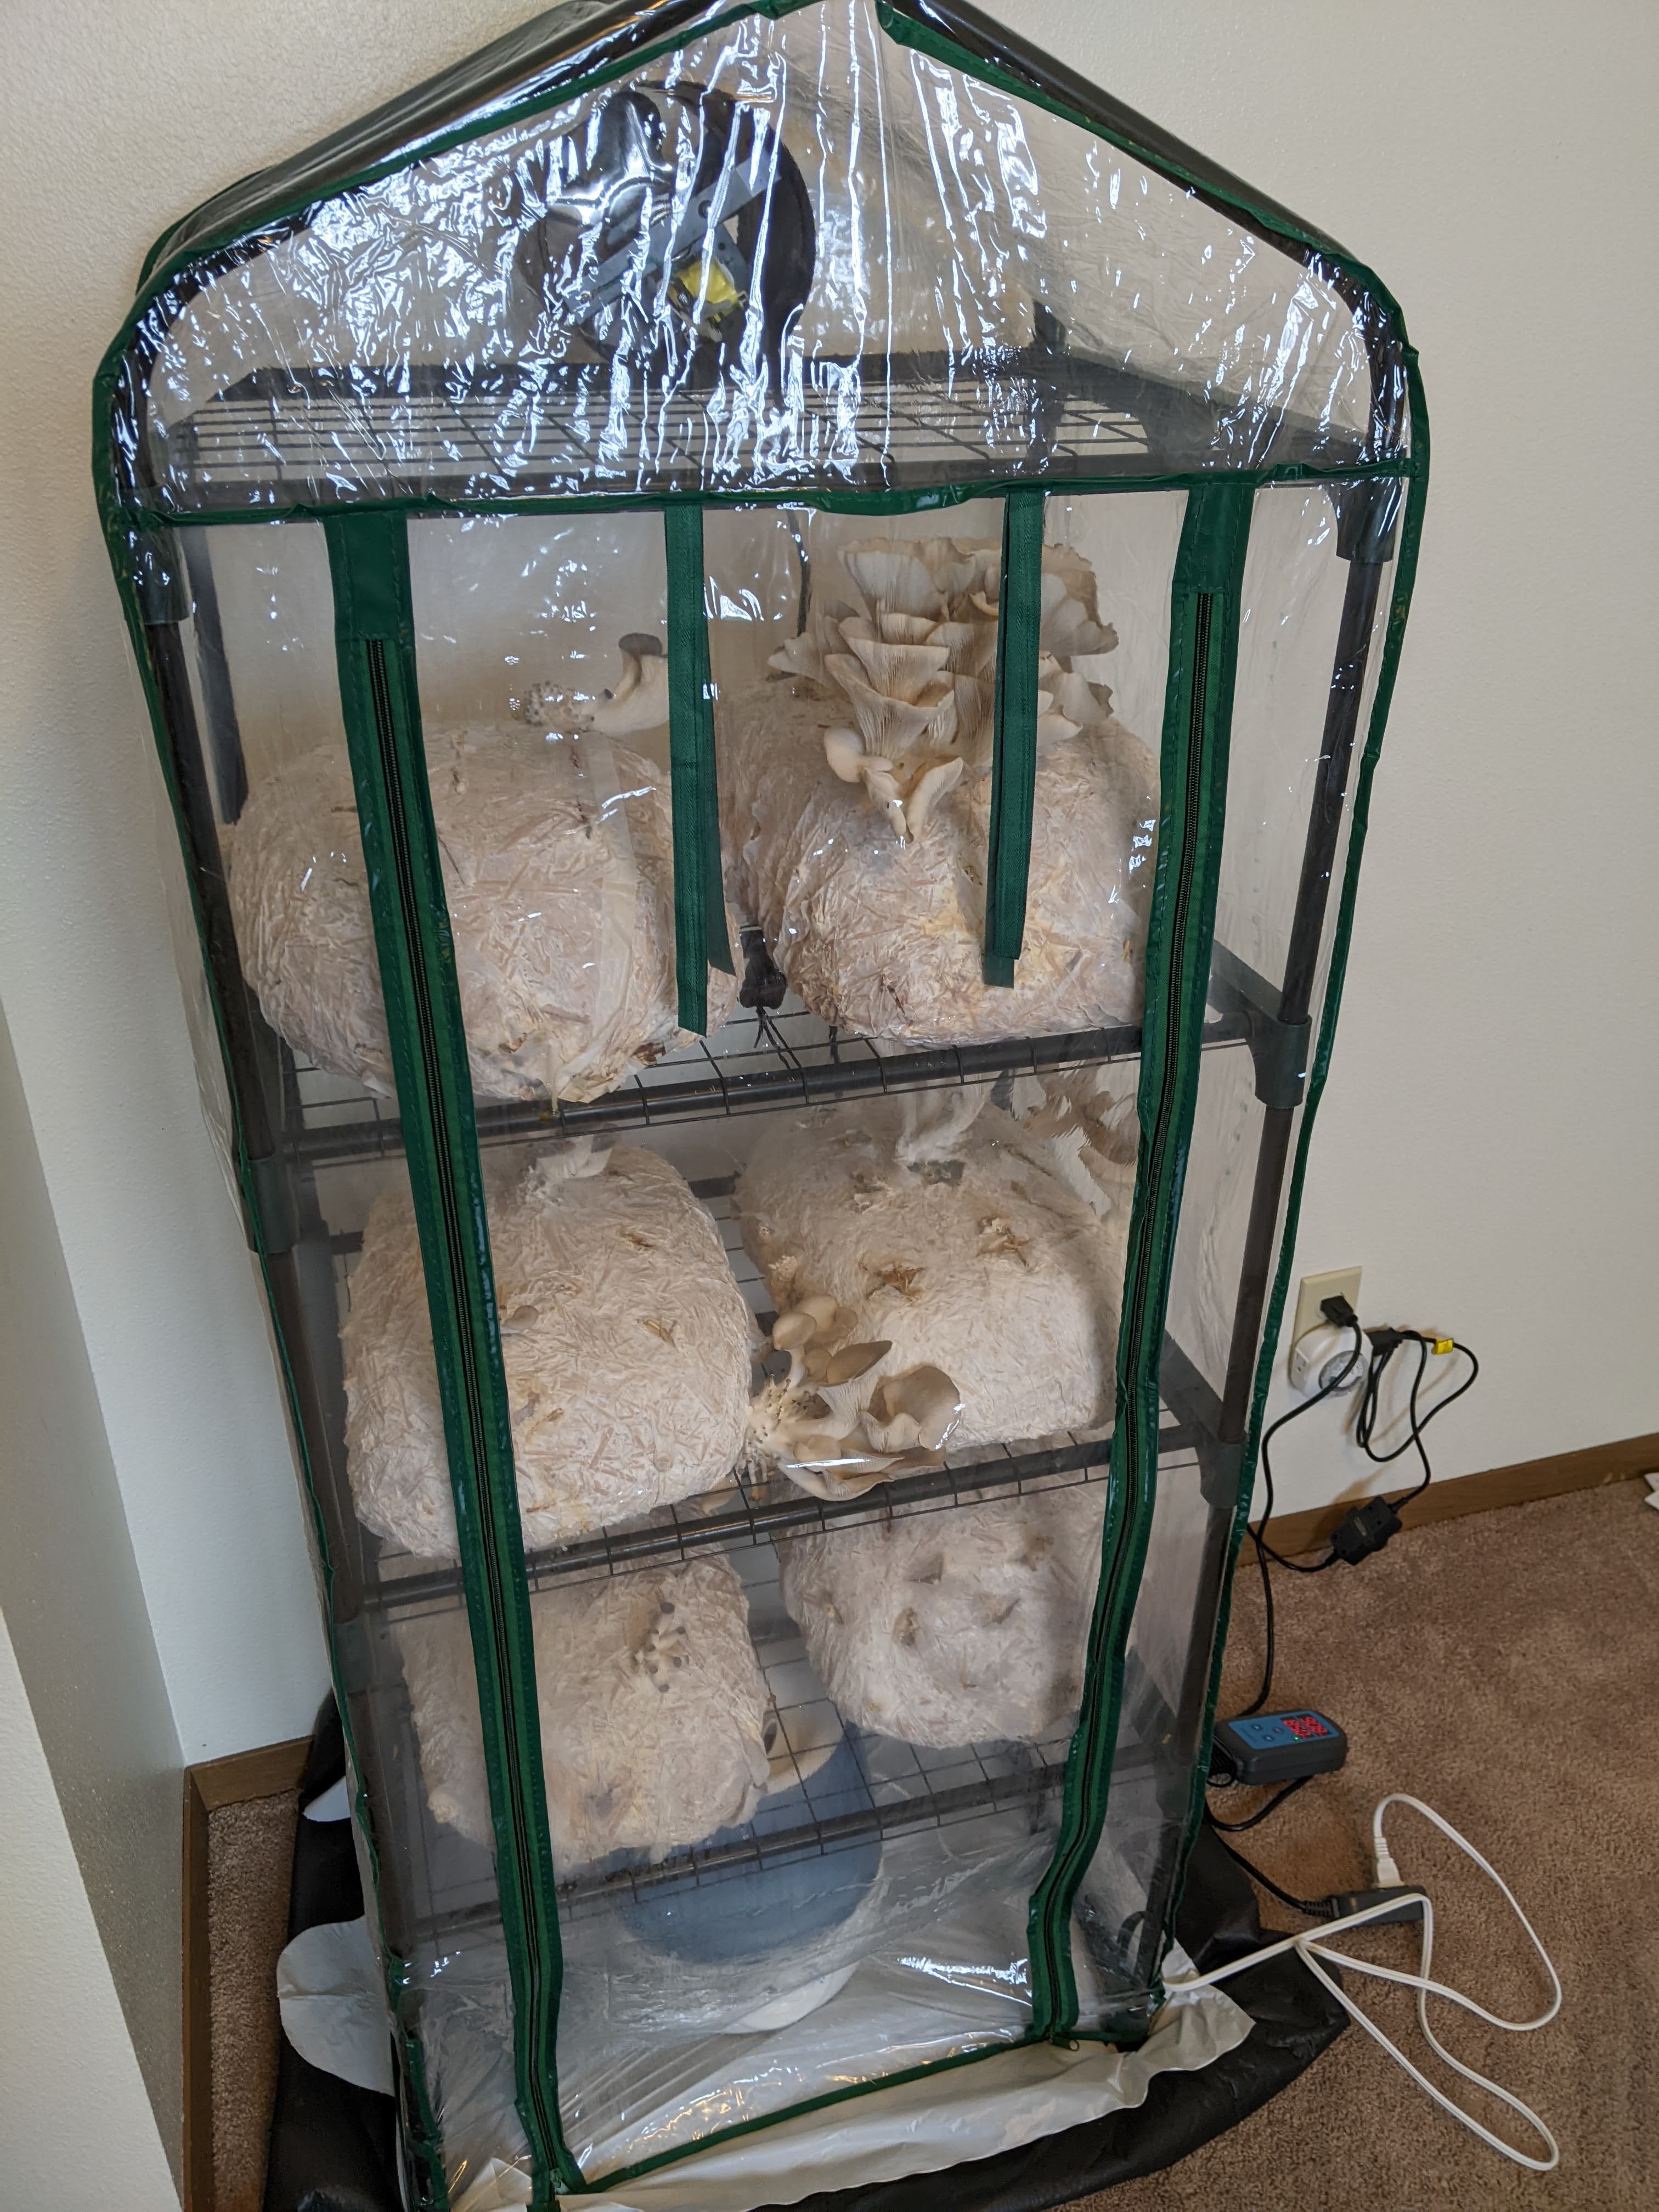
I created an automated growing room to maintain oxygen and humidity levels. The fan at the top is on a timer. It runs ~30 minutes every 2 hours. Most mushrooms need lots of oxygen to grow properly.
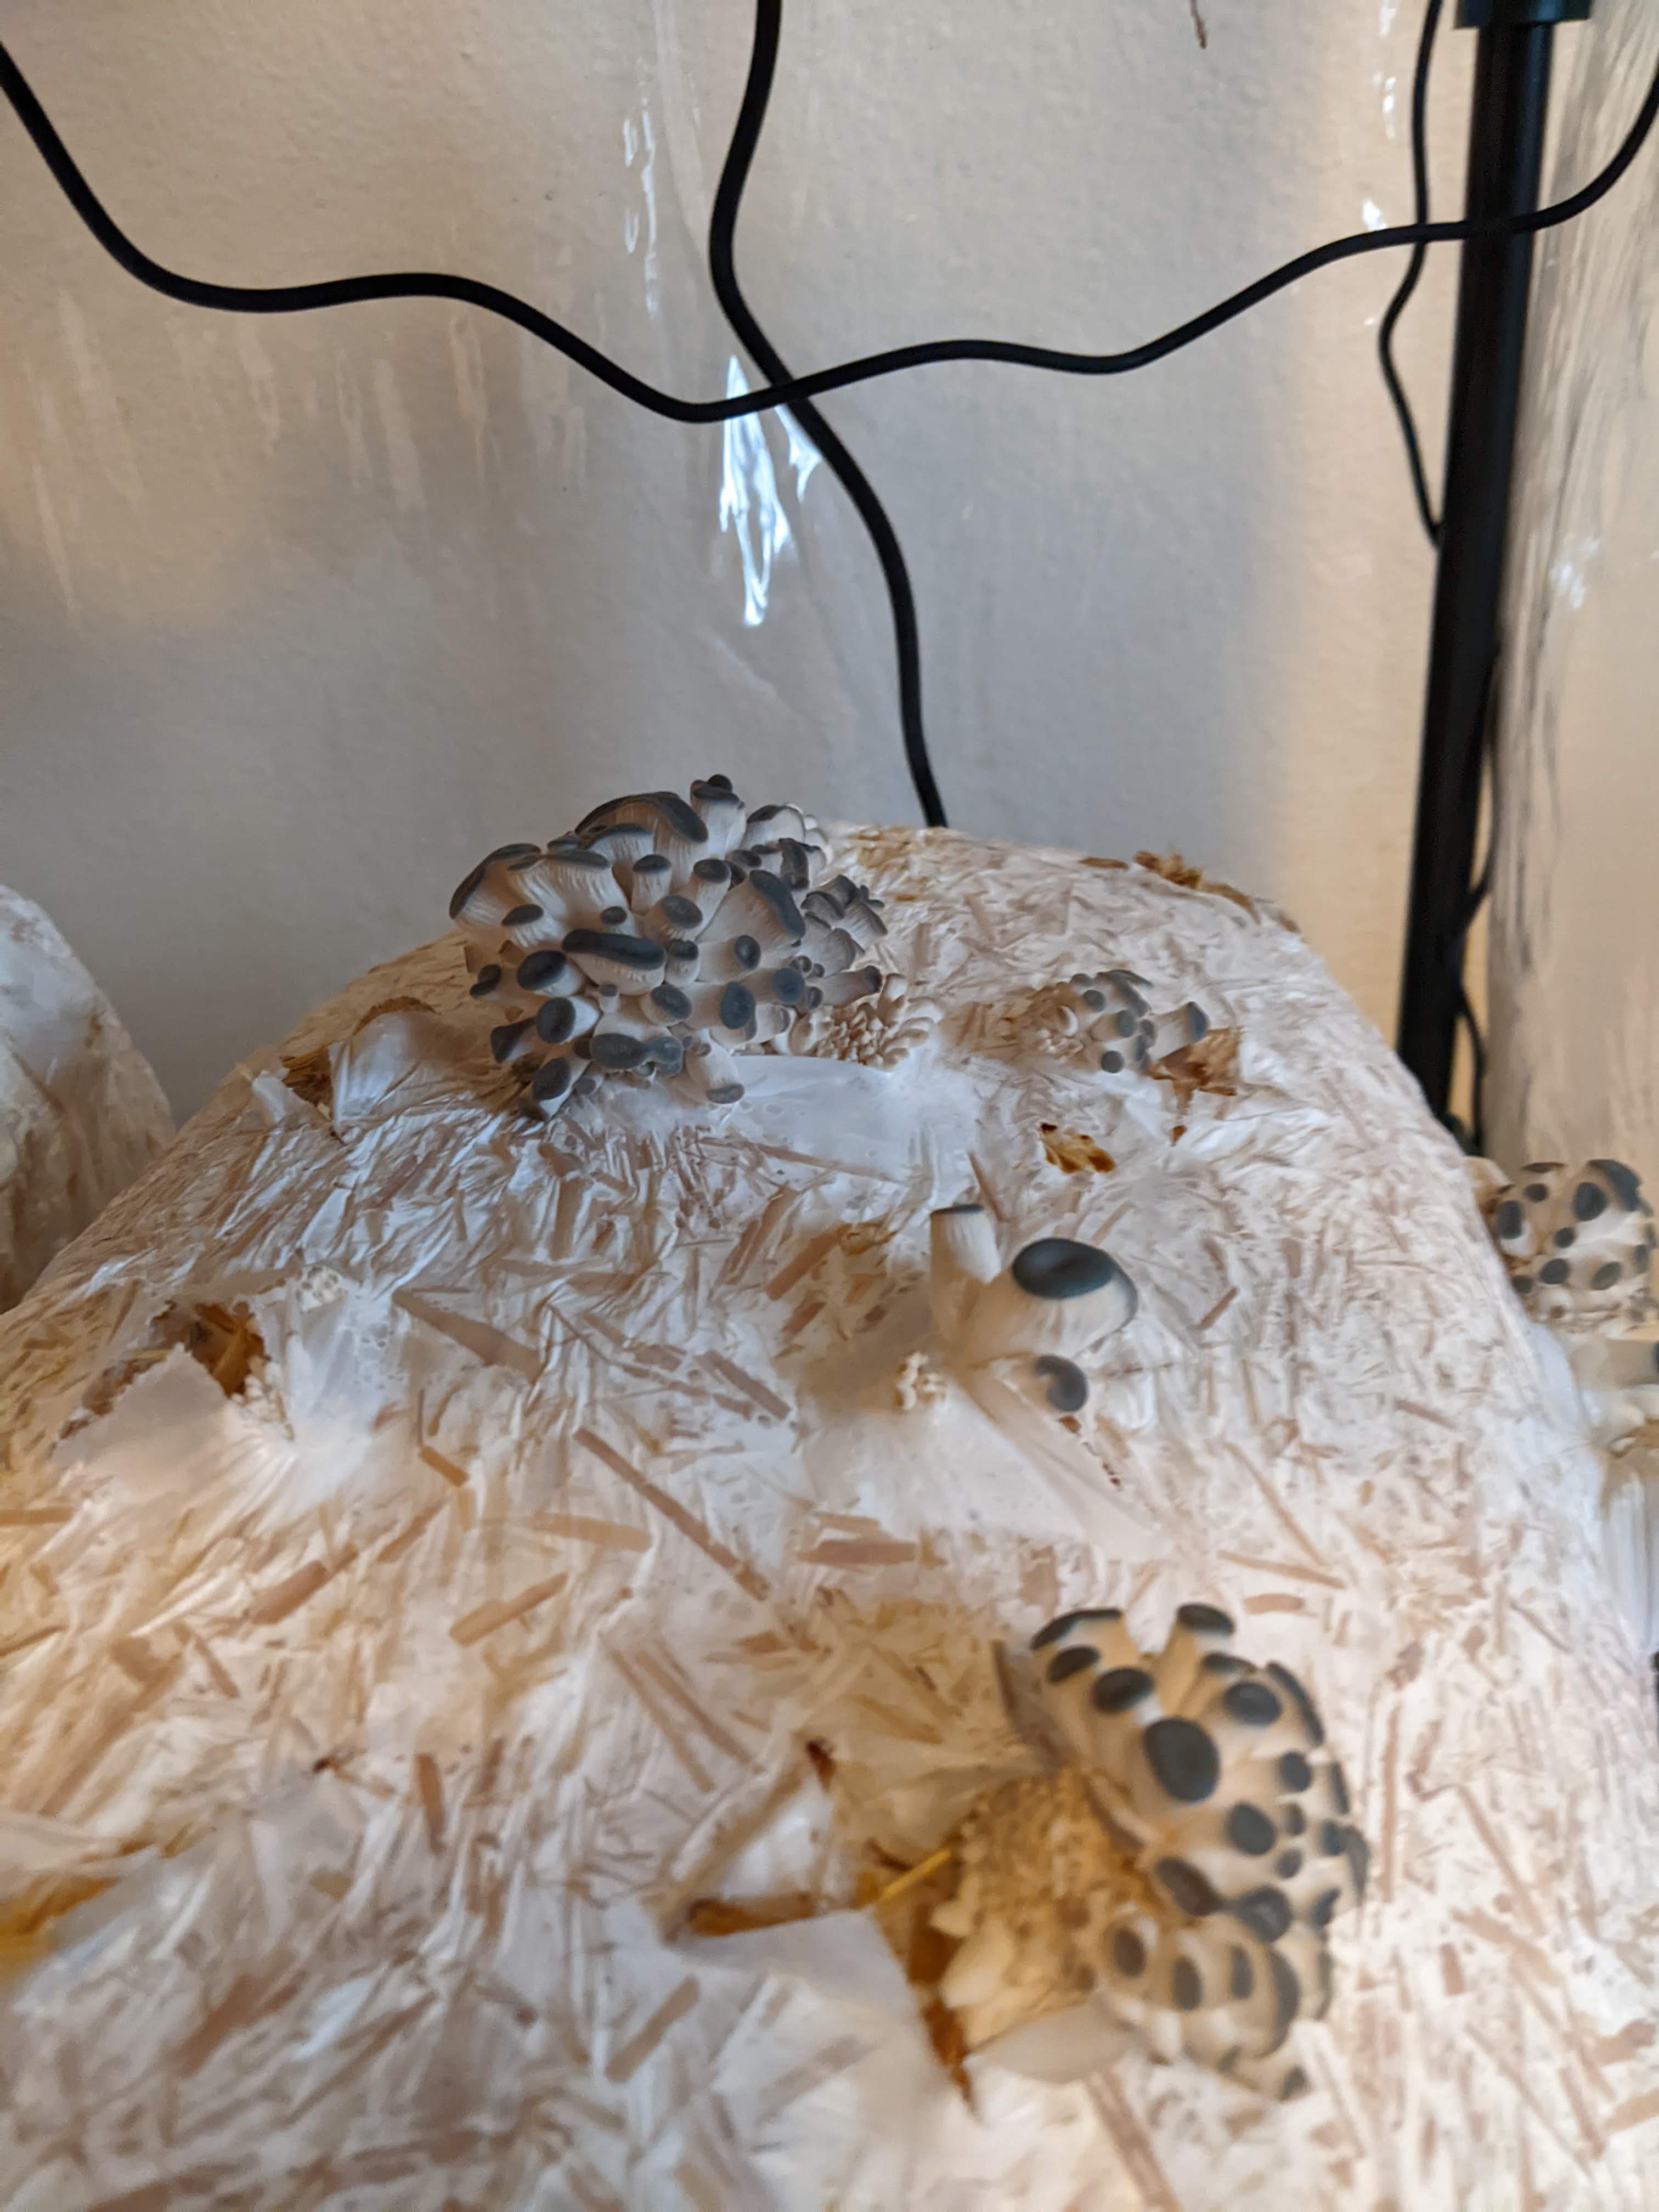
The mushrooms started to pin after a week or two. Here are some beautiful blue oysters arising from the straw bags.
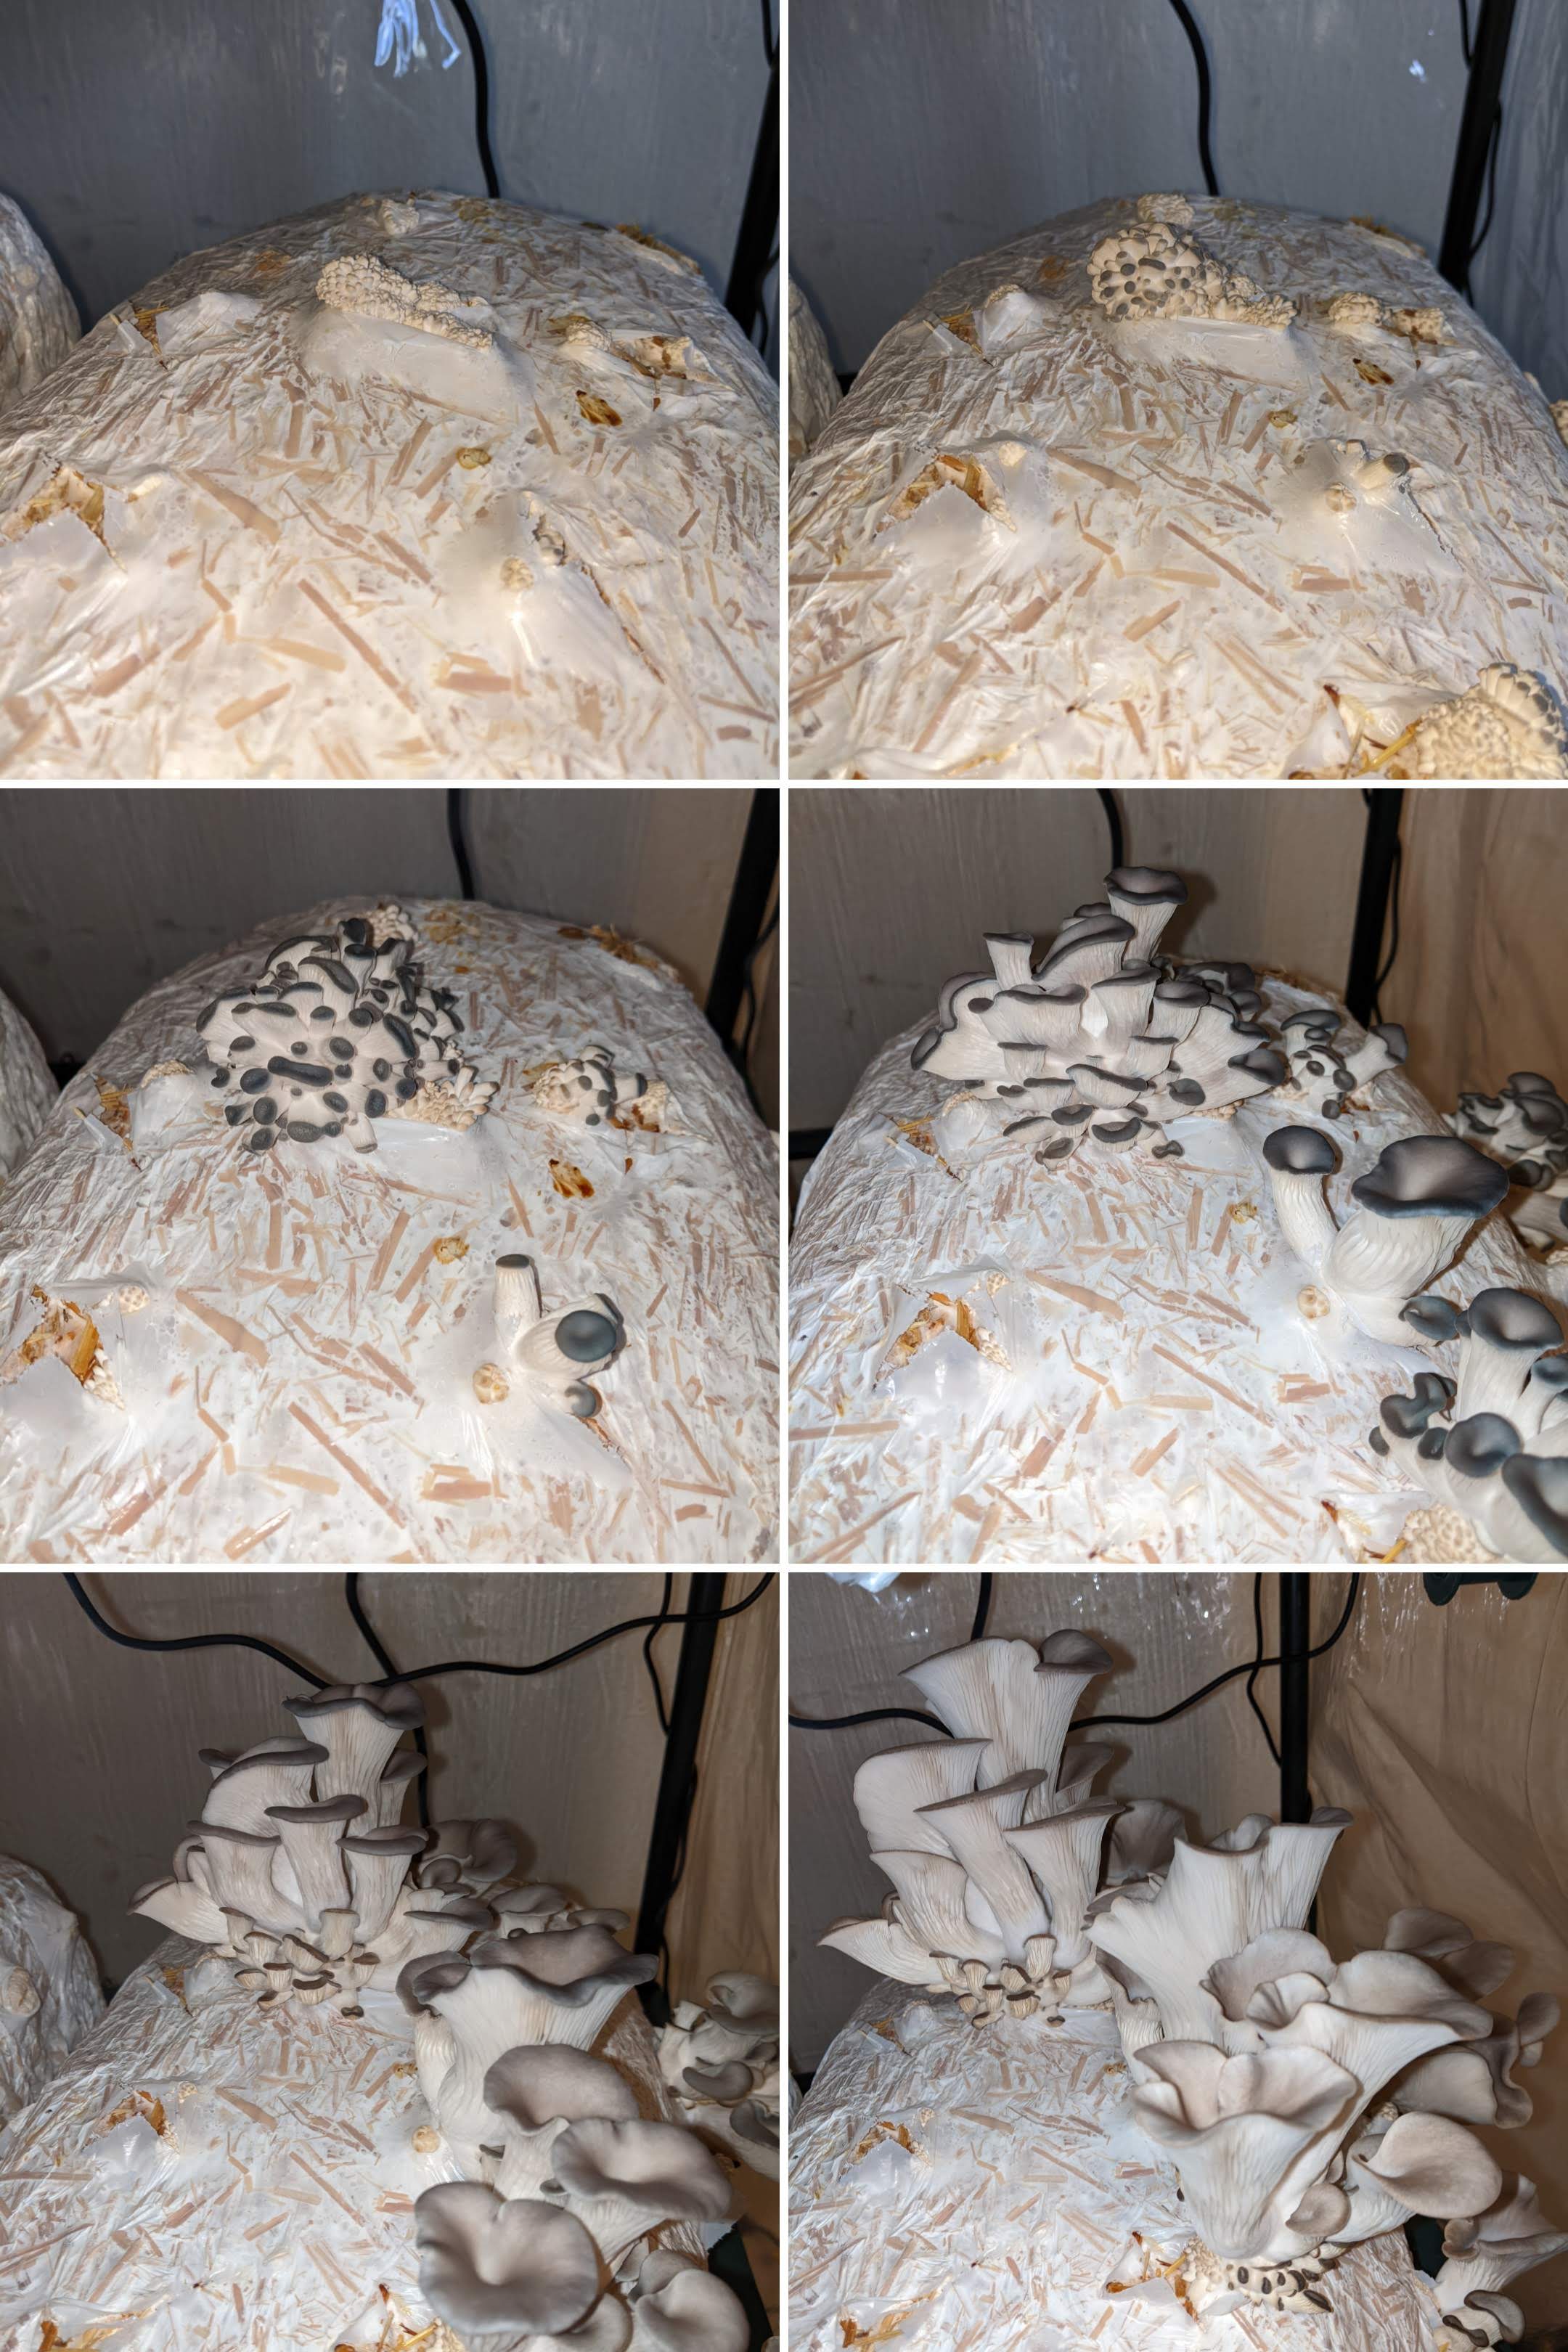
The mushrooms grow quickly, often doubling in size every day! I created a collage where each picture is about 1 day of growth. You can see how quickly they grow at this stage.
Finally, they were ready to harvest. I cut them off and sauteed them in butter. Delicious!
The process of fruiting from sawdust bags will be much the same. After the bags have fully colonized, I will make a few cuts on each one and place them in the fruiting tent. The high oxygen and humidity environment should trigger quick fruiting.
Final Thoughts
The full process of growing mushrooms involves lots of waiting. Below is the timeline of growing oyster mushrooms.
August 6th: Inoculate the grain spawn
September 3rd: Grain spawn is fully colonized. I could have spread the spawn to a fruiting substrate at this point.
September 9th: Fruiting substrate is inoculated. In this case, the straw bags.
September 29th: Fruiting substrate is fully colonized and the mushrooms are starting to pin.
October 6th: The first flush of mushrooms are harvested and ready to eat!
October 28th: This initial batch of mushrooms is still fruiting, albeit much slower and smaller than the first flush. I will likely harvest for the next week or two before composting these bags.
Interestingly, it took exactly two months from starting grain spawn to harvesting the first mushrooms. I probably could have inoculated the fruiting substrate a week or so earlier, but mushrooms are flexible in this way. Two months, although a long time, is also much shorter than the time it takes to grow most any vegetable or fruit.
Thank you for reading (or at least skimming) this article, and I hope you enjoyed! Please feel free to reach out if you want to try growing some yourself and need more information.